Issue #89: Pan Pizza at Home
After Much Eating and Experimentation, I've Determined This Is the Best Pie to Bake at Home
It seems to be “Fast Food Week” here at Kitchen Sense, what with a newsletter about pizza and a podcast about ramen. (Admittedly, neither is very fast to prepare.) Listen to my interview with Ivan Orkin of Ivan Ramen fame on What’s Burning. —Mitchell
I love pizza. Simple as that. I particularly like good pizza. But as the saying goes, even bad pizza is good. The truth is, I don’t eat pizza that often, saving up my pizza quotient and calories for a trip to one of my favorite pizzerias: Razza in Jersey City, New Jersey, where I’ve been known to have my birthday dinners, or Mamma’s Too on the Upper West Side of Manhattan, where the pepperoni cups and crunch on their square pies are exemplary, or any of the New Haven, Connecticut, pizzerias I wrote about here, or the ne plus ultra pie at Pizzeria Bianco in Phoenix, Arizona, or the exuberantly topped pizza a taglio at Bonci in Rome, or anywhere special. You get the idea. This is not to say that I didn’t have a slice or two at the ersatz pizza parlor aboard the Liberty of the Seas during my recent tai chi retreat at sea. But in general, I hold out for the good stuff.
One problem with this approach is that because I save up all my pizza cravings for a few favorite destinations, when pizza at one of these places is finally placed in front of me, I can’t control myself. I usually eat myself sick. I don’t recommend this approach.
Making pizza is one of those things that is generally better left to the professionals #imho. Pizzerias proof larger quantities of dough, have hotter ovens, can more skillfully shape the dough, and generally are able to maximize the synergy of the few ingredients that constitute a great pizza better than can be achieved at home. I know there is a growing trend of household pizzaioli, who use sourdough starters and gas-fired backyard ovens to fine effect. I am not one of them.
Admittedly, I used to think bread baking was another task better left to pro bakers in artisanal bakeries. But after some keen instruction and a lot of practice I’m producing loaves I think have better flavor and texture than most I can buy. So, maybe there is hope for my pizza, yet.
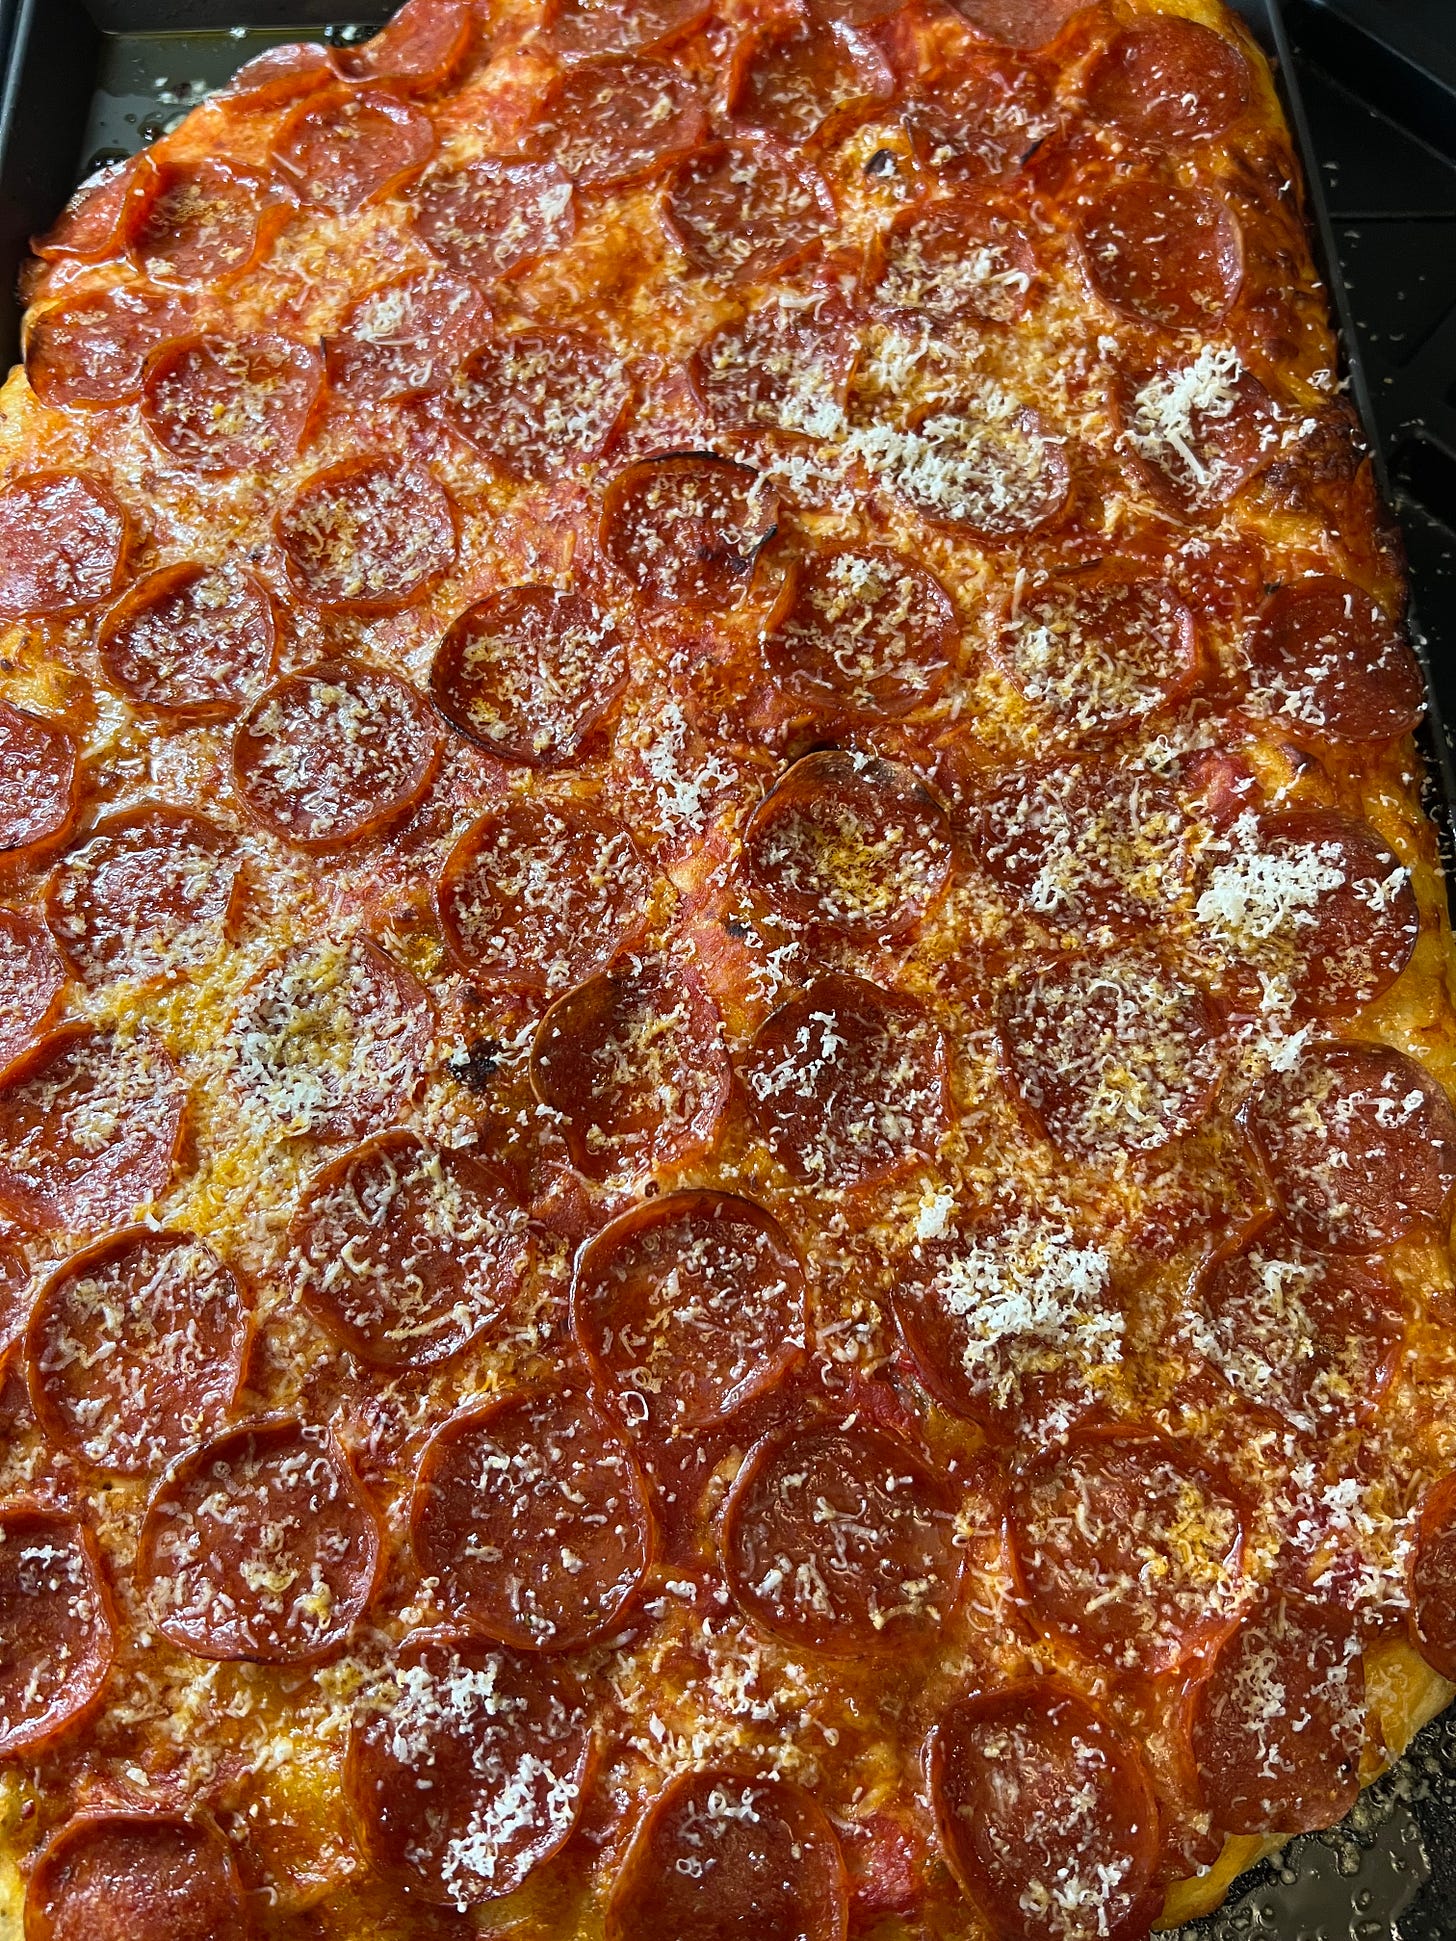
Until then, the only pizza I make at home with any regularity that satisfies a craving for the real thing is a rectangular pan pizza, which can go by the name grandma, Sicilian, or Detroit, depending on where you are eating it and on certain debatable attributes of the toppings and crust. You can find endless threads online about the differences between these different styles of pan pizzas. But I suspect unless you eat them side by side they are not so easy to distinguish.
When I was researching my article on New Haven pizza, about the only thing anyone could agree on was that the most famous New Haven pizzerias all made different styles of pizza. Some used natural leaven, others didn’t. Some ovens were fired by coke, a coal byproduct, others by gas. The one unifying characteristic was that in New Haven, it seems, pizza is never sold in slices—you have to order a whole pie.
On the opposite end of the replication spectrum is Neapolitan pizza, which has a set of strict rules and a governing body to oversee strict adherence to them, the Associazione Verace Pizza Napoletana. Of course, such rules don’t guarantee quality, and there is considerable variance within the category, certified or not. Some of the best pizzaioli of Naples and the surrounding Campania region actively resist such policing, favoring their own formulas and techniques.

My point is, I don’t really care what you call my pizza. I know it is good. The dough works both for pan pizzas, which I have most success with at home, and individual Neapolitan style pies, which, as I’ve already noted, I choose to leave to the professionals. I wanted to share the recipe with you because it doesn’t rely on any special flours or even sourdough starter (though you can use some for extra flavor). Instead, it makes use of a poolish, that is, an overnight yeasted preferment, to develop flavor and texture. And I think it is very good.
A Few Pointers
If you are going to be making pizza pretty regularly, you may want to consider ordering a special pan from Lloyd Pans here. Their aluminum alloy and patented coating helped me achieve the parlor crust and crunch I was looking for. You’ll note they have different sizes and shapes of pans for all the regional styles of pan pizzas, which they take a stab at defining on their website. I chose a 12-inch by 18-inch grandma pizza pan because I like the size (similar to a half sheet pan) and the connotation, but pick the one that resonates with you.
I’ve been using King Arthur unbleached, all-purpose flour for testing, which I know is readily available across the country. But if you have a preferred unbleached, all-purpose flour from another mill, use that. A protein content of about 12% is ideal. I like Shepherd’s Grain and Central Milling flours.
I use Saf instant yeast.
For the best, most consistent results, I suggest you weigh your ingredients in metric (!), so you’ll also need a scale.
I set my Lloyd grandma pan on a preheated pizza stone in my oven to ensure a crisp crust, but if you don’t have a stone, you can bake it right on the rack. It may take a few minutes longer.
I am grateful to Ken Forkish, whose pizza I love and whose book Flour Water Salt Yeast informed my own approach to baking pizza at home
RECIPE: Mitchell’s Pizza Dough—Poolish Method
For the Poolish
333 g unbleached, all-purpose flour (about 2 2/3 cups)
333 g water (about 1 1/2 cups)
2.5 g instant yeast (a scant 1/8 teaspoon)
For the Dough
333 g unbleached, all-purpose flour (about 2 2/3 cups)
14 g kosher salt (about 3/4 tablespoon)
167 g water (about 2/3 cup)
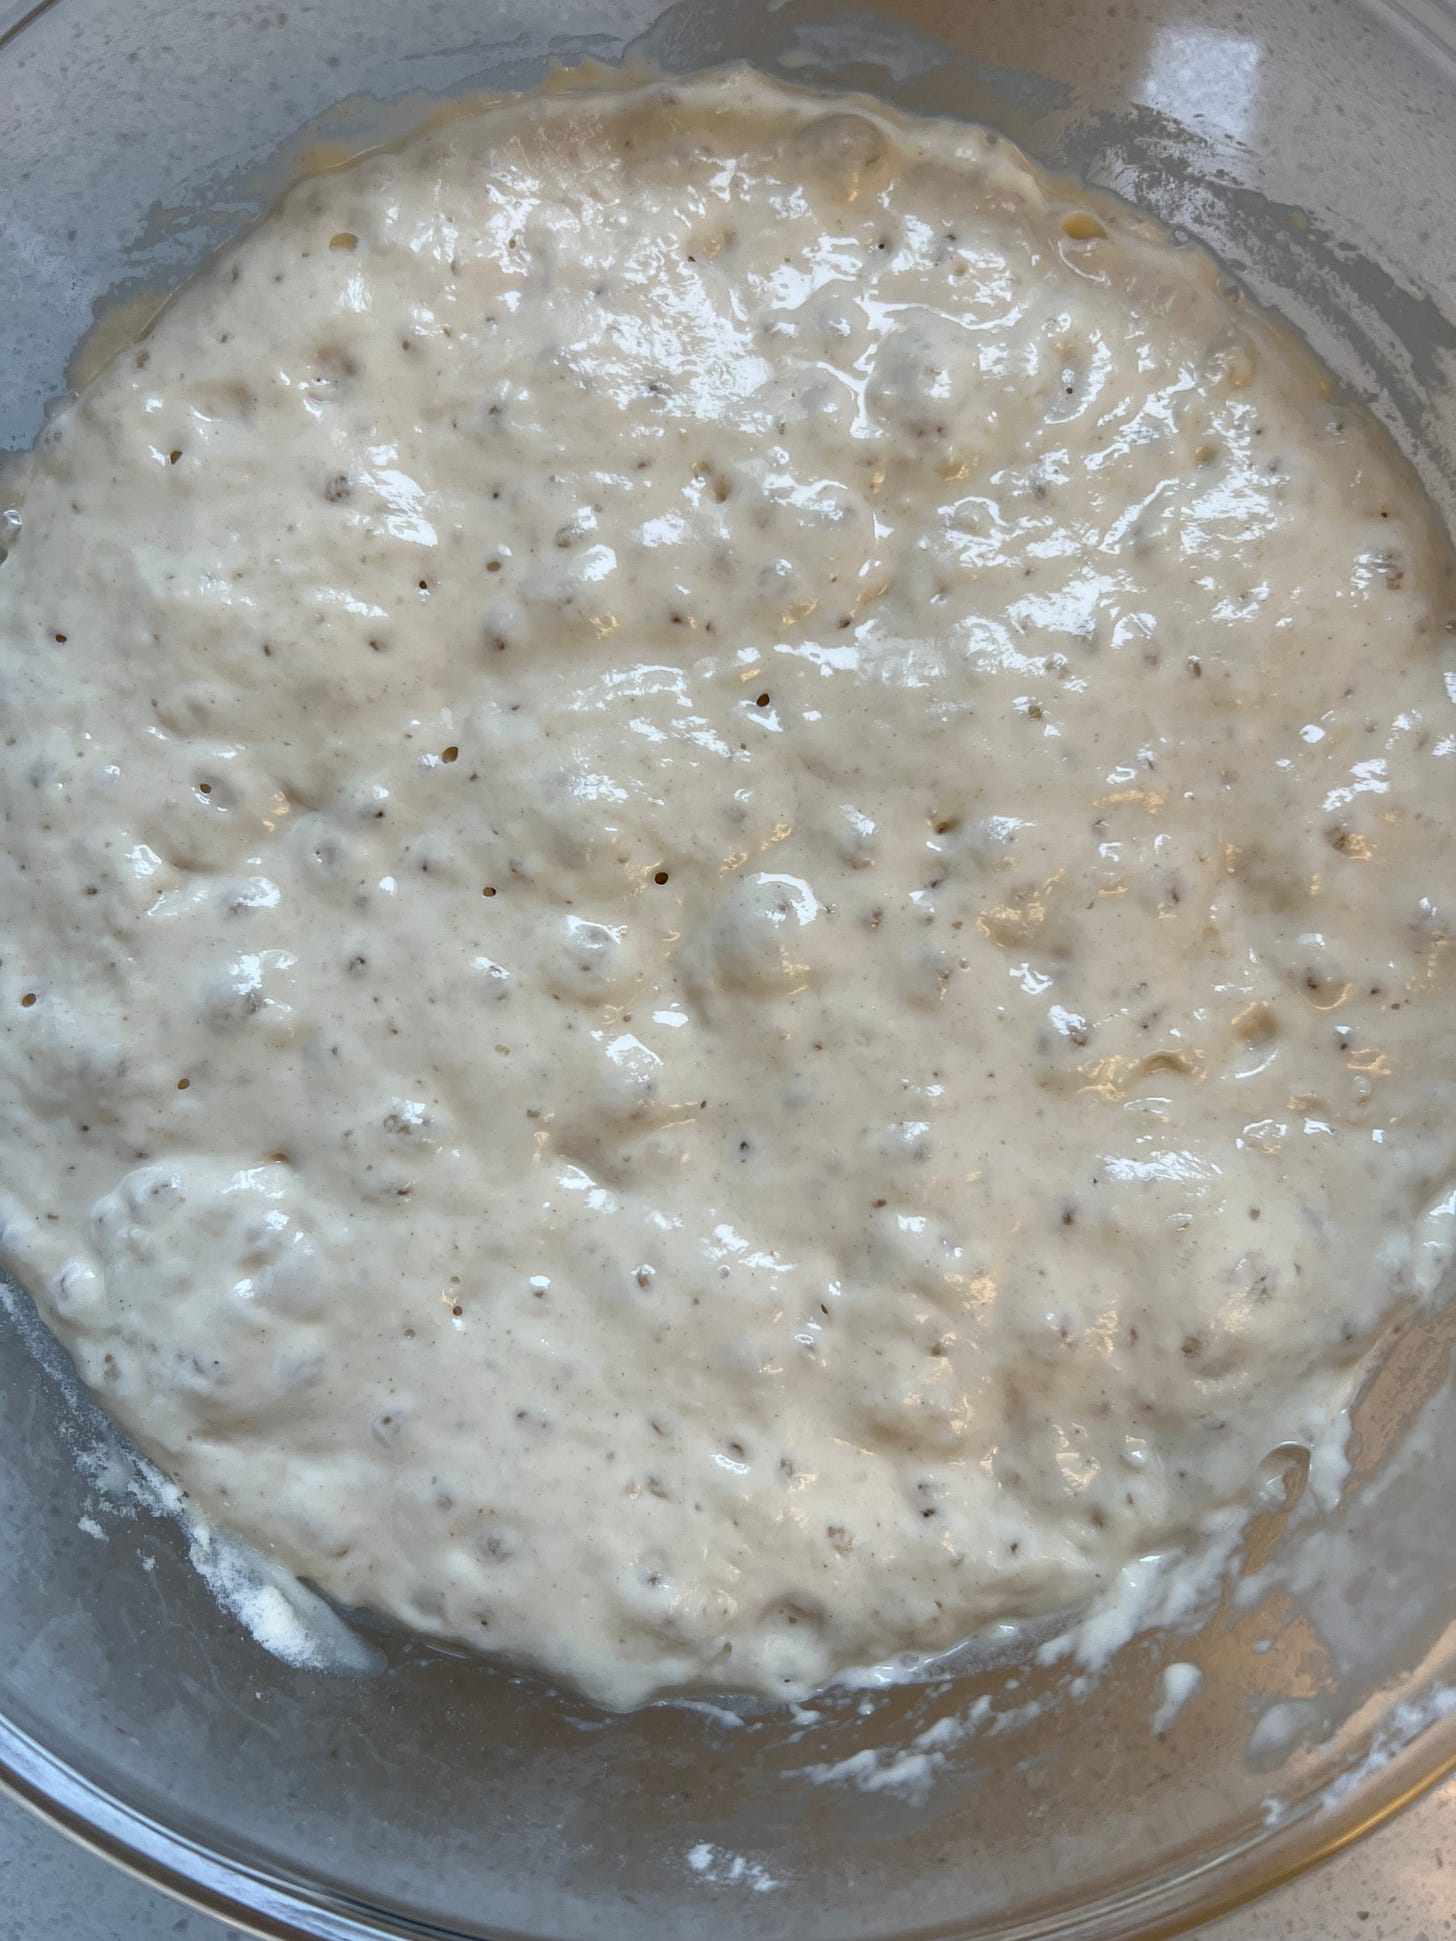
One night or two before you intend to bake your pie, mix the poolish. In a medium bowl, combine the flour, water, and yeast, and mix well with a wooden spoon or rubber spatula until all of the flour is moistened. Cover with a silicon lid or plastic wrap and let sit at room temperature for 12 to 14 hours, not more. It will expand and bubble. This is the poolish, which is a type of pre-ferment that improves the flavor and texture of the finished dough.
Once poolish is ready, place the remaining flour for the dough in the bowl of stand mixer along with the salt. Pour the water around the edge of the poolish in its bowl to loosen it, and then tip the whole thing into the mixer bowl with the flour, scraping out all traces of the poolish. Using a dough hook, work this mixture on low speed until it comes together into a coherent mass, and then let it knead for a total of about 4 or 5 minutes, until it comes away from the bowl. It may still be a little sticky. Scrape the dough out of the mixer bowl into a clean glass bowl or plastic proofing container, cover, and let sit for 30 minute to relax.
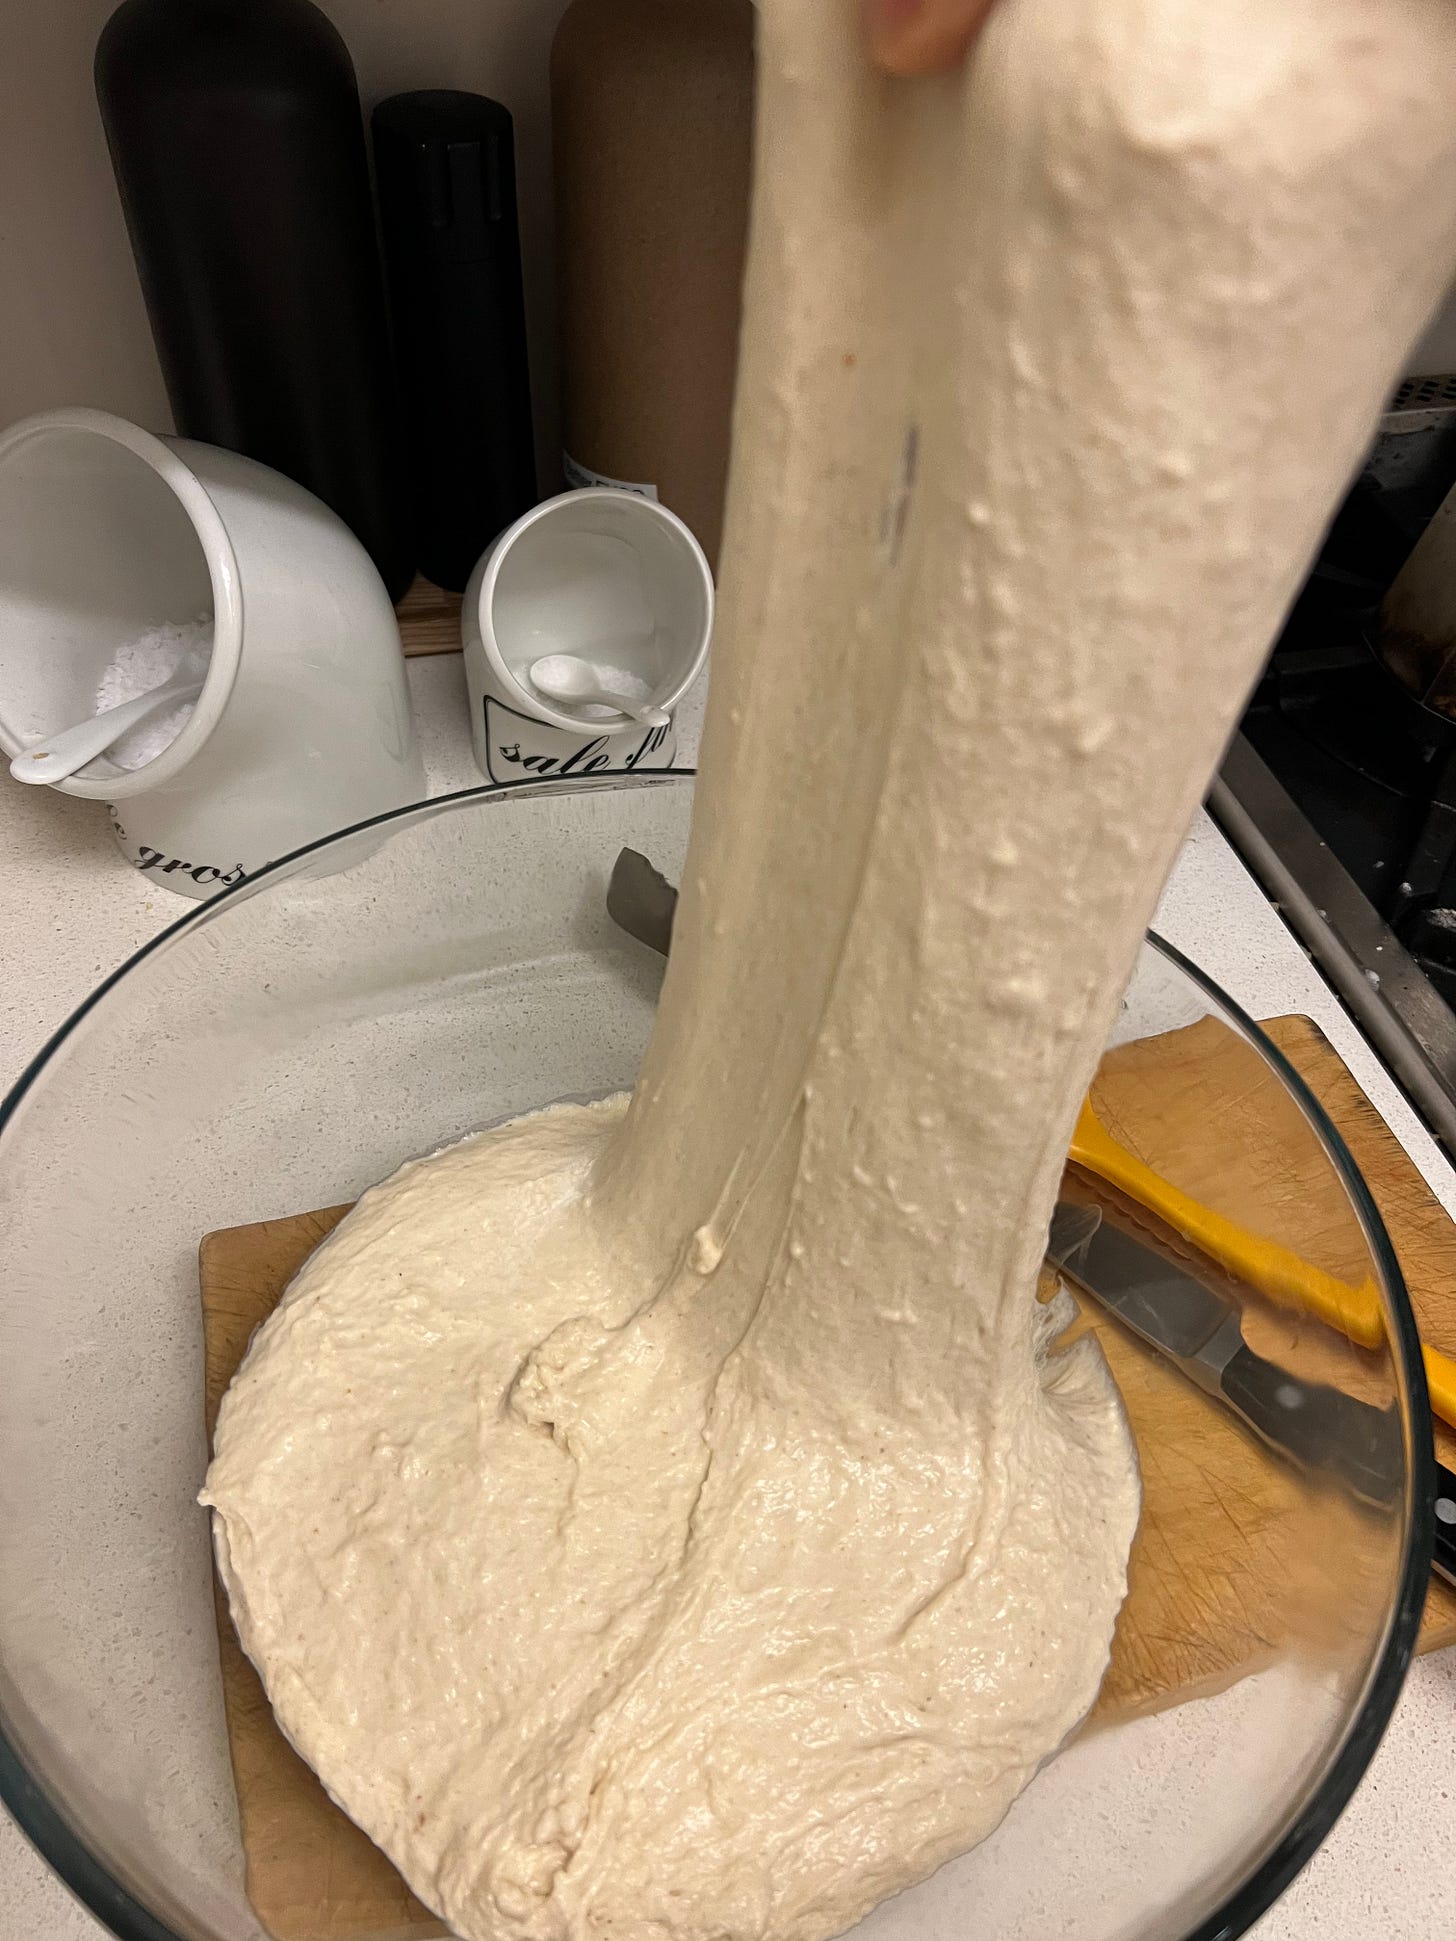
After 30 minutes, you need to “stretch and fold” the dough. You can find a detailed description of the technique here or elsewhere online. I wet my right hand, slip it under the mass of dough, pull it up high out of the bowl, and fold it over. Then I turn the bowl a quarter turn and repeat three more times until each “corner” of the dough is stretched and folded. Cover, let sit 30 minutes, and repeat the stretch and fold once more. If the dough is particularly slack, you can give it another stretch and fold after another 30-minute rest, but it shouldn’t be necessary.
Now the dough just has to sit for 5 or 6 hours to ferment, so it will be ready to make pizza for dinner. When it is ready, the dough should be visibly risen, almost doubled in size, and have large air bubbles on the surface. You can make the pie at this point, which is what I usually do, or for added flavor, you can shape it into a ball, cover it, and let it rest in the refrigerator for another 24 hours.
When it comes to pizza toppings, I’m a minimalist. I always order the Margherita, sometimes even just a marinara, what in New Haven they call a “plain pie” (tomato, no cheese). At home, I like to make a simple, garlicky tomato sauce and then use low-moisture mozzarella (in American brick form, not fresh-pulled Italian mozzarella in balls) and pepperoni (Battistoni is my favorite brand). You can also bake this dough into a focaccia, topping it with just olive oil and salt, and maybe some rosemary for a little pizzazz.
RECIPE: Mitchell’s Pan Pizza
For the Pizza Sauce
3 tablespoons extra-virgin olive oil
1/2 small onion, finely chopped
3 cloves garlic, minced
Pinch crushed red pepper
One 14-ounce jar Italian tomato passata or one 14-ounce can tomato purée
2 teaspoons tomato paste (optional)
1 teaspoon dried oregano
Salt and pepper to taste
For the Pizza Topping
Extra-virgin olive oil
8 ounces low-moisture, brick mozzarella, preferably thinly sliced, but shredded will also work
8 ounces pepperoni, thinly sliced
Freshly grated Parmigiano-Reggiano or Pecorino Romano
To make the sauce, heat the oil in a small saucepan. Add the onion and sauté until soft. Add the garlic and cook a minute or two until fragrant. Pour in the tomato passata or purée and use about half as much water to clean out the can. Add this to the pot as well. Add the tomato paste, if using, oregano, and salt and pepper and simmer, covered, for about 15 minutes, until the flavors meld. Taste and adjust the seasoning. You will have enough sauce for two pan pizzas. Freeze half.
To assemble and bake the pie, set a pizza stone in the middle of the oven, if using, and preheat to 500°F. for at least an hour. Drizzle about ¼ cup of olive oil into an 18” by 12” or 13” pizza pan or an ordinary sheet pan. Scrape the fermented dough out of the proofing bowl and into the pan. Dip your fingertips in the oil and then use them to push the dough to the edges of the pan. The dough will expand and retract, but keep pushing, working from the center out, until it takes up most of the surface area of the pan. Be careful not to poke holes in the dough. Instead, you want to push and jostle it gently to extend it. At a certain point, it won’t expand any more. Let the dough rest 10 to 15 minutes for the gluten to relax. Wash your hands. Then go back and push it some more. You can stretch and let it rest a few times if you need the gluten to relax in order to get the dough to fill the pan.
If you refrigerated your dough overnight, you should let it sit at room temperature for about an hour in the pan to warm up. But if you are shaping your dough from room temperature, you are ready to bake.
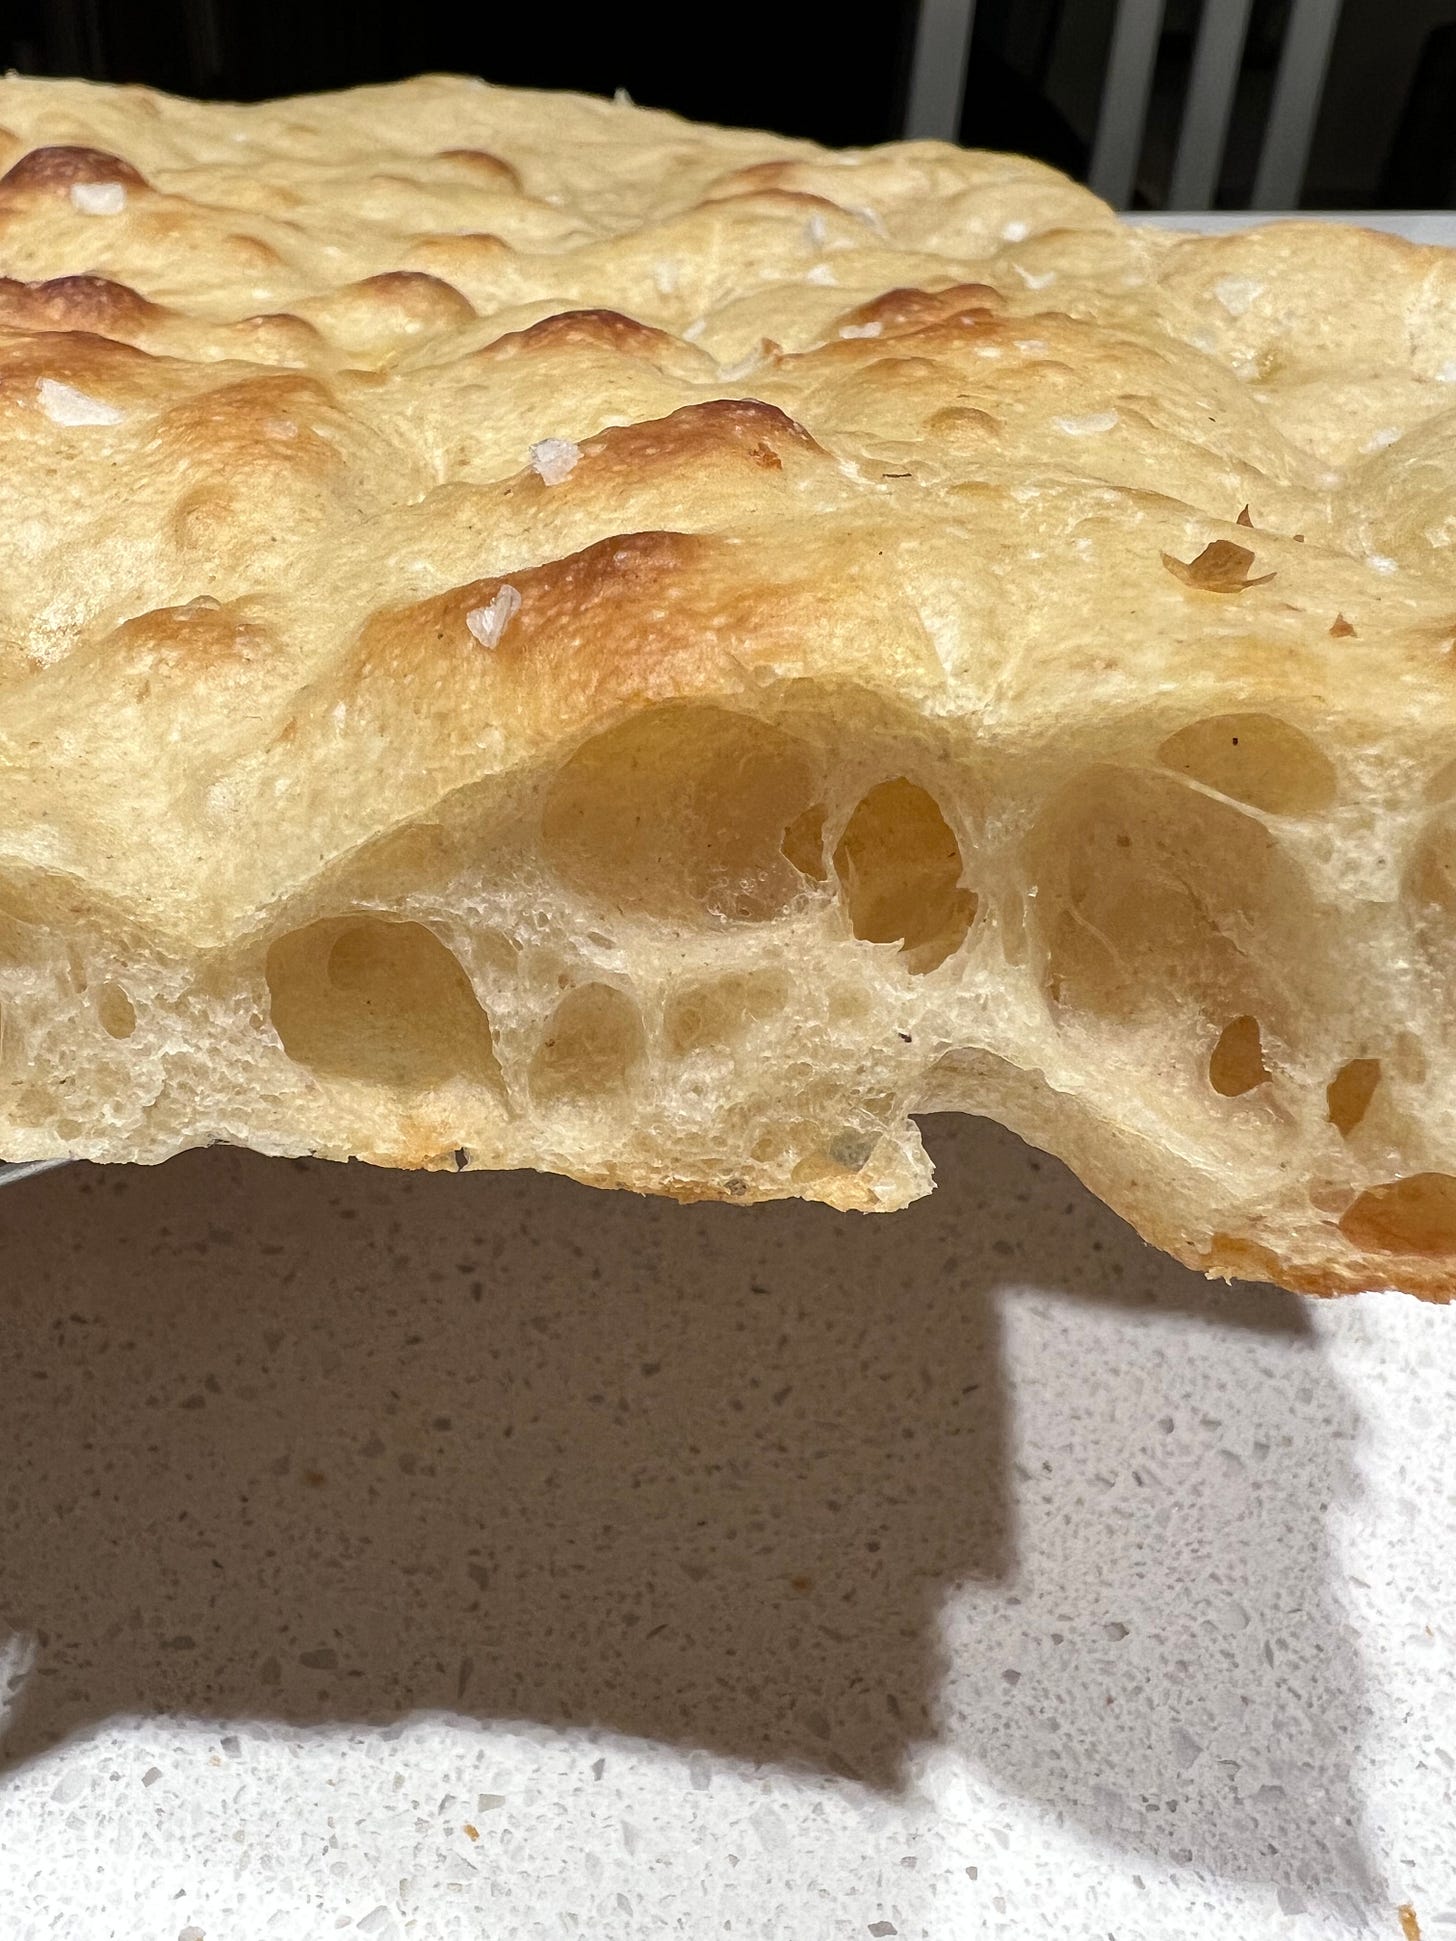
To make a focaccia, drizzle the stretched dough with additional olive oil, sprinkle with flaked salt and an herb, such as fresh rosemary, and set the pan on the stone in the preheated oven. Reduce the temperature for 450°F, and bake for about 15 minutes until risen and nicely browned.
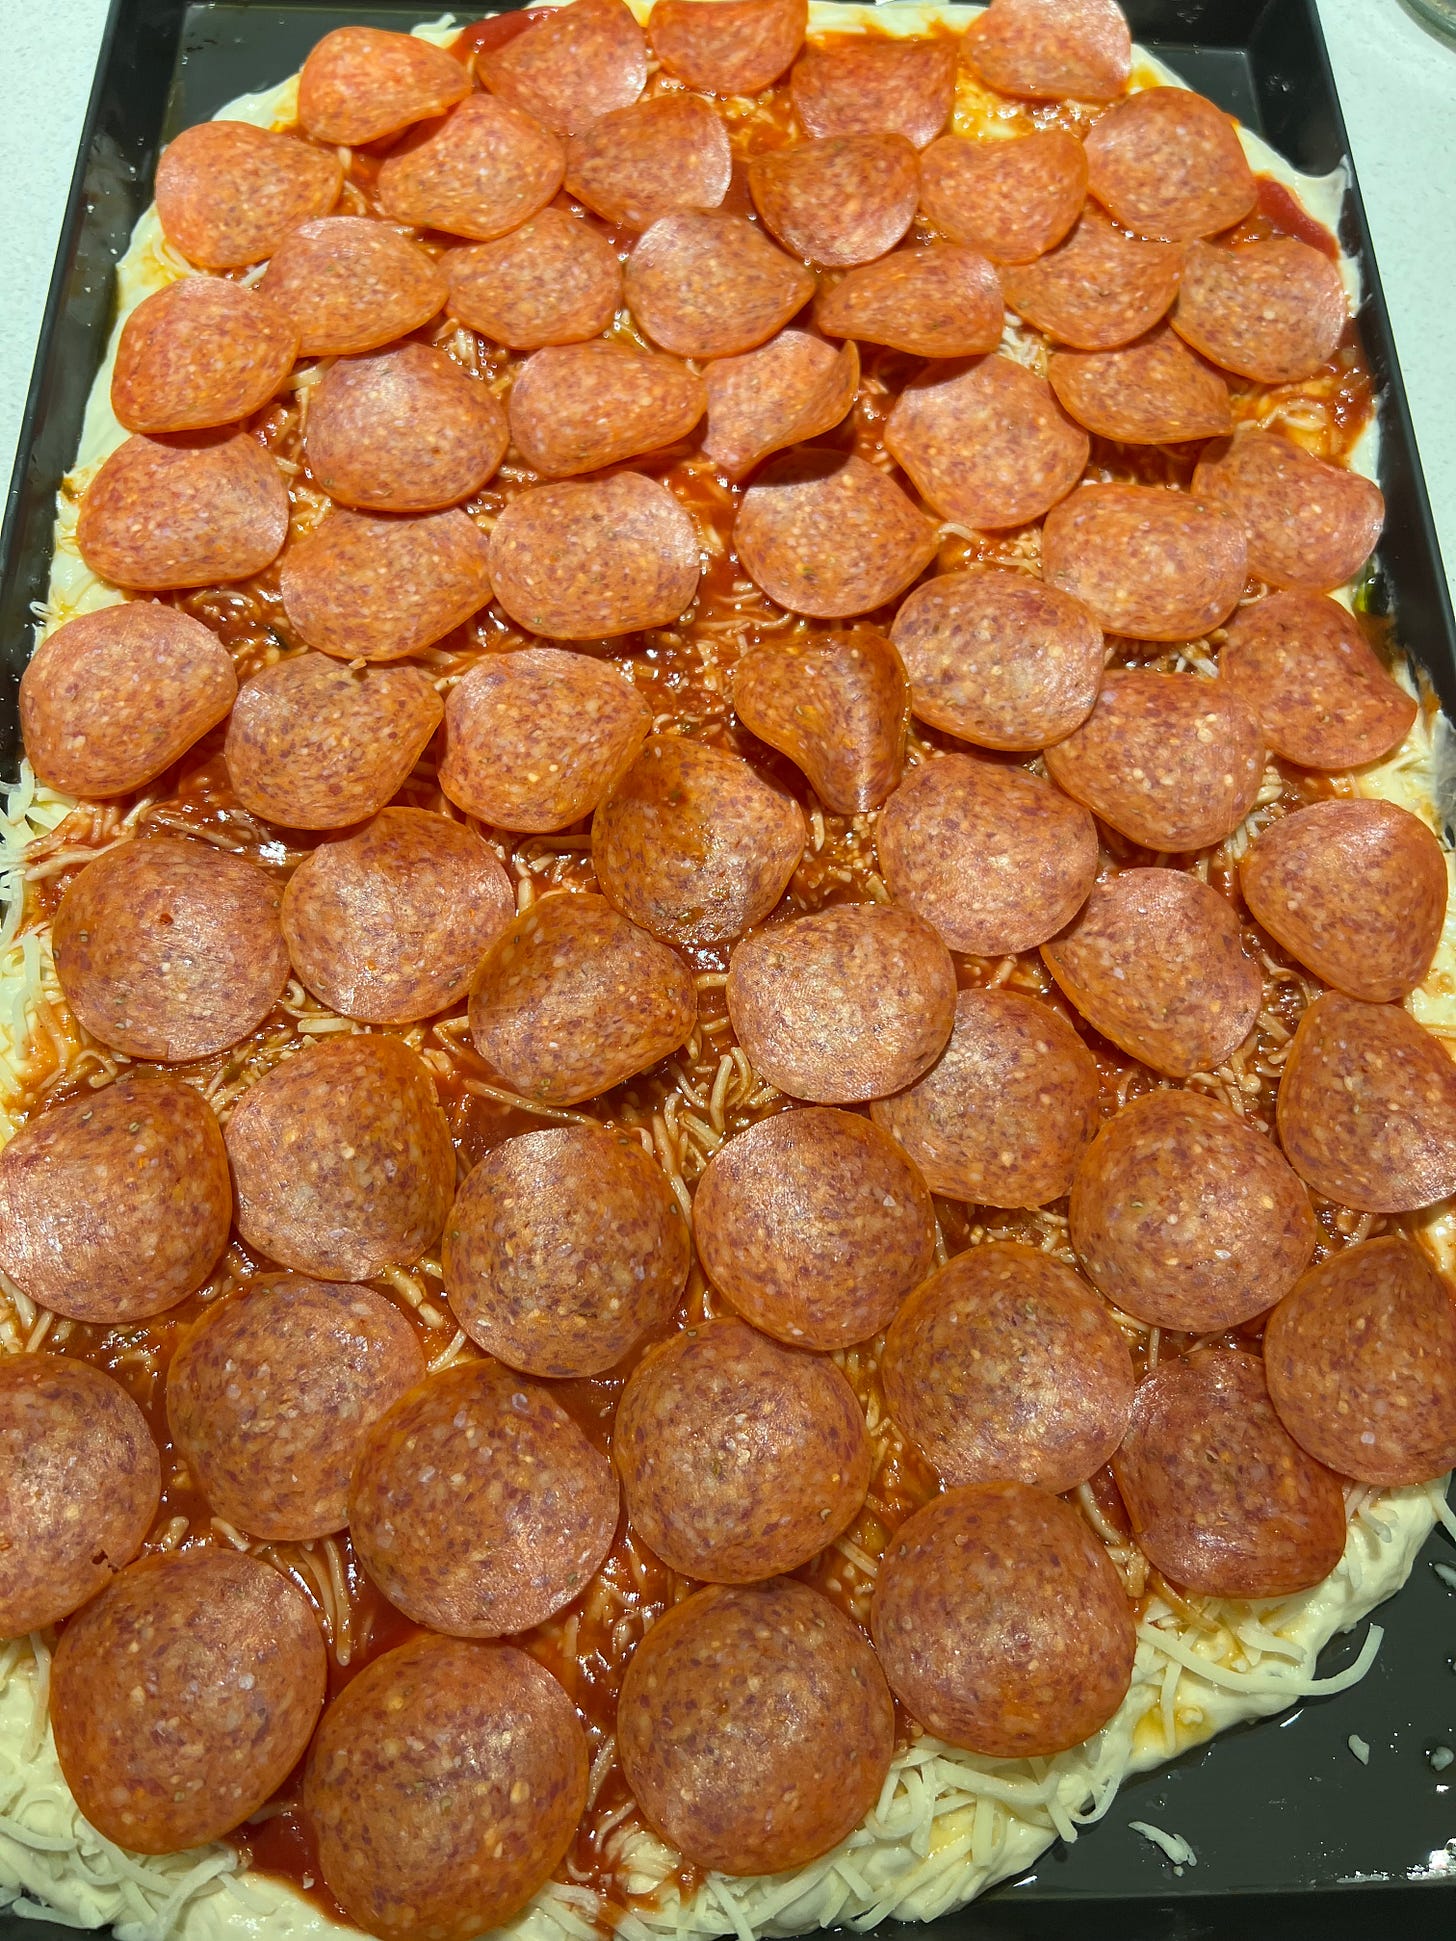
To make the pizza, arrange the mozzarella over the top of the dough. Spoon about half of the sauce evenly on top of the cheese, and then arrange the pepperoni slices on top of that. Set the pan on the stone in the preheated oven. Reduce the temperature to 450°F and bake for 15 to 20 minutes, until the cheese is melted and bubbly, the pepperoni has browned and formed cups, and the crust has visibly browned on the bottom. To finish, you may want to switch the oven to broil and watch carefully as the pepperoni, cheese, and crust brown to a perfect doneness. Remove from the oven, scatter a handful of grated Parmigiano or Pecorino over the top, let sit for 5 minutes to cool slightly, then slice and serve.
VARIATION: Mitchell’s Pizza Dough—Combination Poolish and Sourdough Method
Sometimes for added flavor, I add a sourdough component to my pizza dough. I follow the same ratio and technique generally, but, I take about 50 g of flour and water out of the poolish, mix it with 10 g of sourdough starter, and ferment it overnight alongside the poolish. Add this levain to the dough mix, and follow the rest of the directions as written. The sourdough combination benefits from an extra 24 hour rest in the refrigerator before shaping.
Note, to shape individual pizzas from these doughs, divide the dough into three or for equal portions, shape into balls, and follow Ken Forkish’s directions here.



OMG! That looks and smells out of this world! When are you going to make it for me? Great article, as always.
Mitchell, your pizza looks glorious and I'm ready to head to the kitchen and get started. But here's a question I have, not just for you but very frequently with US ingredients listed in metric: Why the very specific 333 grams of flour and 333 grams of water? What happens if I miss a beat and add 334 or even 335 grams of flour? Or am I aiming for equal metric quantities of flour and water and the 333 grams really doesn't matter so much? Could I go as high as 350 grams? This all sounds very silly but I'm honestly quite serious in asking it. You are not alone in your specificity, by any means. Call me: Puzzled in Maine