Such a Flake: Pie Crust 101
Fool-Proof Flaky Pie Dough, Some General Recipe Thoughts, Peach Pie!
Hi all. Welcome to this week’s newsletter, Issue #11. If you just joined, you have a lot to catch up on: jam, mayonnaise, soy sauce chicken, pancakes, polenta, and more. As always, thanks to all of you who have signed up and to those of you who have paid to subscribe. If you are a fan, please like, share, comment, and otherwise promote this newsletter to your family and friends who like to cook and eat. My mission is to help folks realize that good cooking isn't some mysterious alchemy, but rather a wonderful and rewarding skill that everyone can develop with some good advice and a little practice.
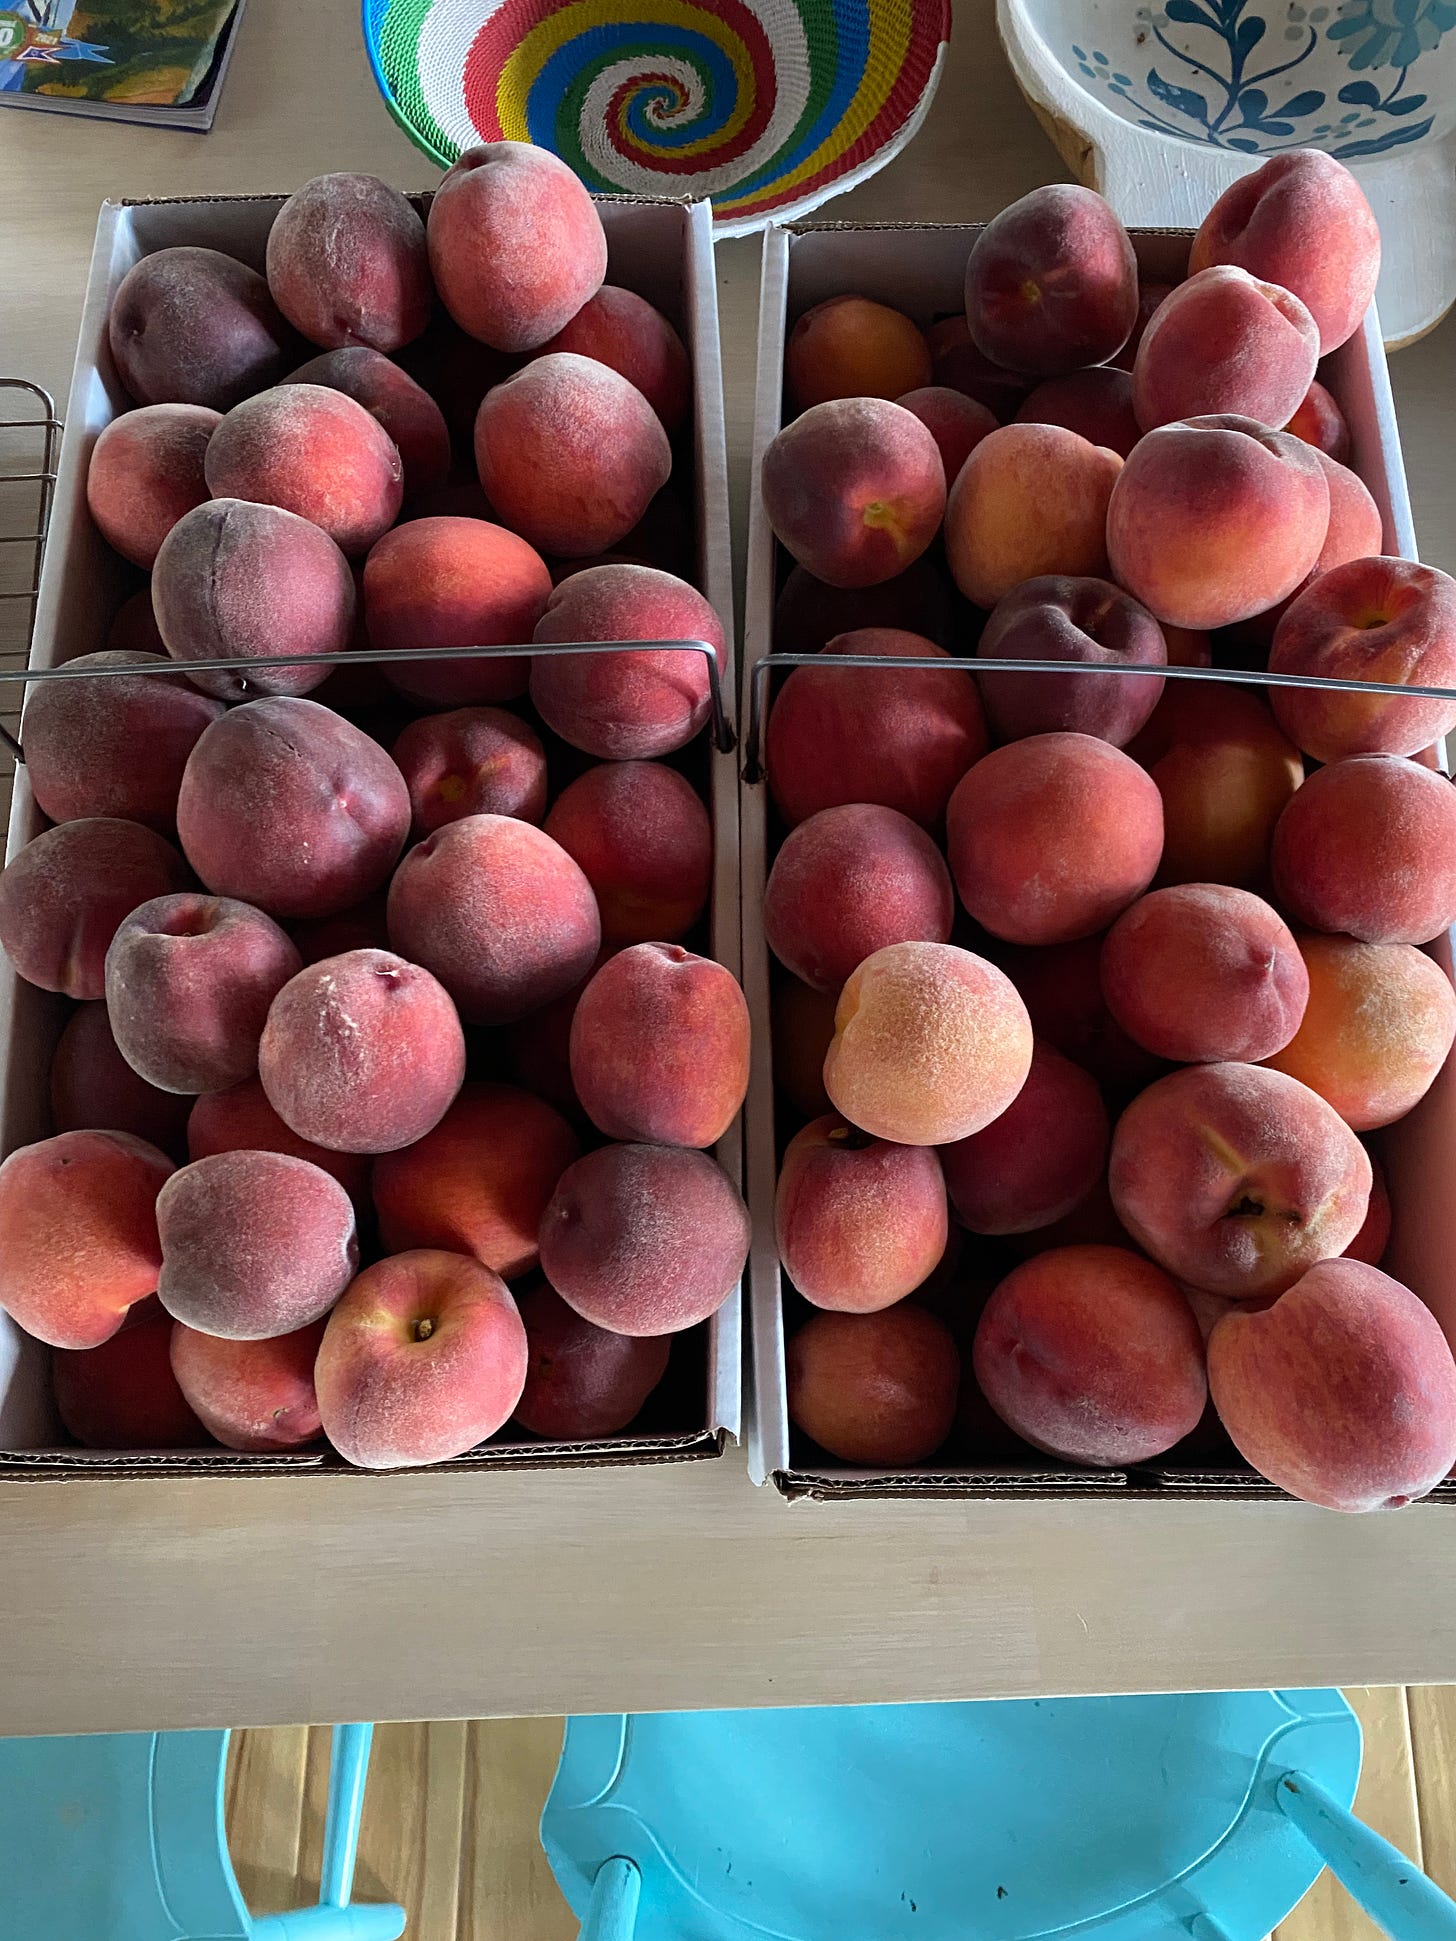
It’s peak summertime fruit season and that means it’s pie season. We went peach picking with some friends the other day at Indian Creek Farm in Ithaca, NY, and in less than 30 minutes we had more peaches than we knew what to do with. We started by making three batches of peach-honey-lavender jam and a peach pie. We gave peaches to neighbors. I made a filling for a future peach pie. I roasted some peaches for a future ice cream. We’ve hardly made a dent.
I’ve never quite understood the phrase “easy as pie” because a pie is kind of a pain in the ass—fruit pies, especially. For starters, I know many people are intimidated by making pie crust. The directions often don’t make sense, e.g., “cut in the butter with two knives until it’s the size of small peas.” What the f*@k does that mean? Then peeling, pitting, and/or otherwise prepping the fruit can be time consuming. Getting the gel of the filling just right so you don’t make fruit soup in a soggy crust requires some alchemy. No one element is particularly difficult, but put it all together and a pie can be a production. What’s worse, is that after all of that effort, the result is often disappointing. But get it right and it’s a miracle.
One thing I don’t ever worry about is the crust. That is because decades ago I settled on a recipe for what is consistently the flakiest, most flavorful pie crust I know. What’s more, it’s so easy it requires no special skill—just a food processor. The original technique came from Julia Child. I tweaked her recipe slightly decades ago. It is now my house crust. I’ve published the recipe in three cookbooks and a few articles. I usually have some in the freezer so I can whip up a dessert asap. I know the proportions by heart.

Note, this is not a dough to use to make a tart shell, in the French sense (although I’ve used it for that on occasion). Doughs for tarts are usually shorter and sweeter. (I use one of Pierre Hermé’s recipes for pâte sucrée). This is a good ol’ American pie crust, the kind you might hope to find enveloping pies in a breakfast spot in the southern United States, or at a diner in the mid-Atlantic region, or maybe at a gas station in Vermont, if these places still offered delicious homemade pies.
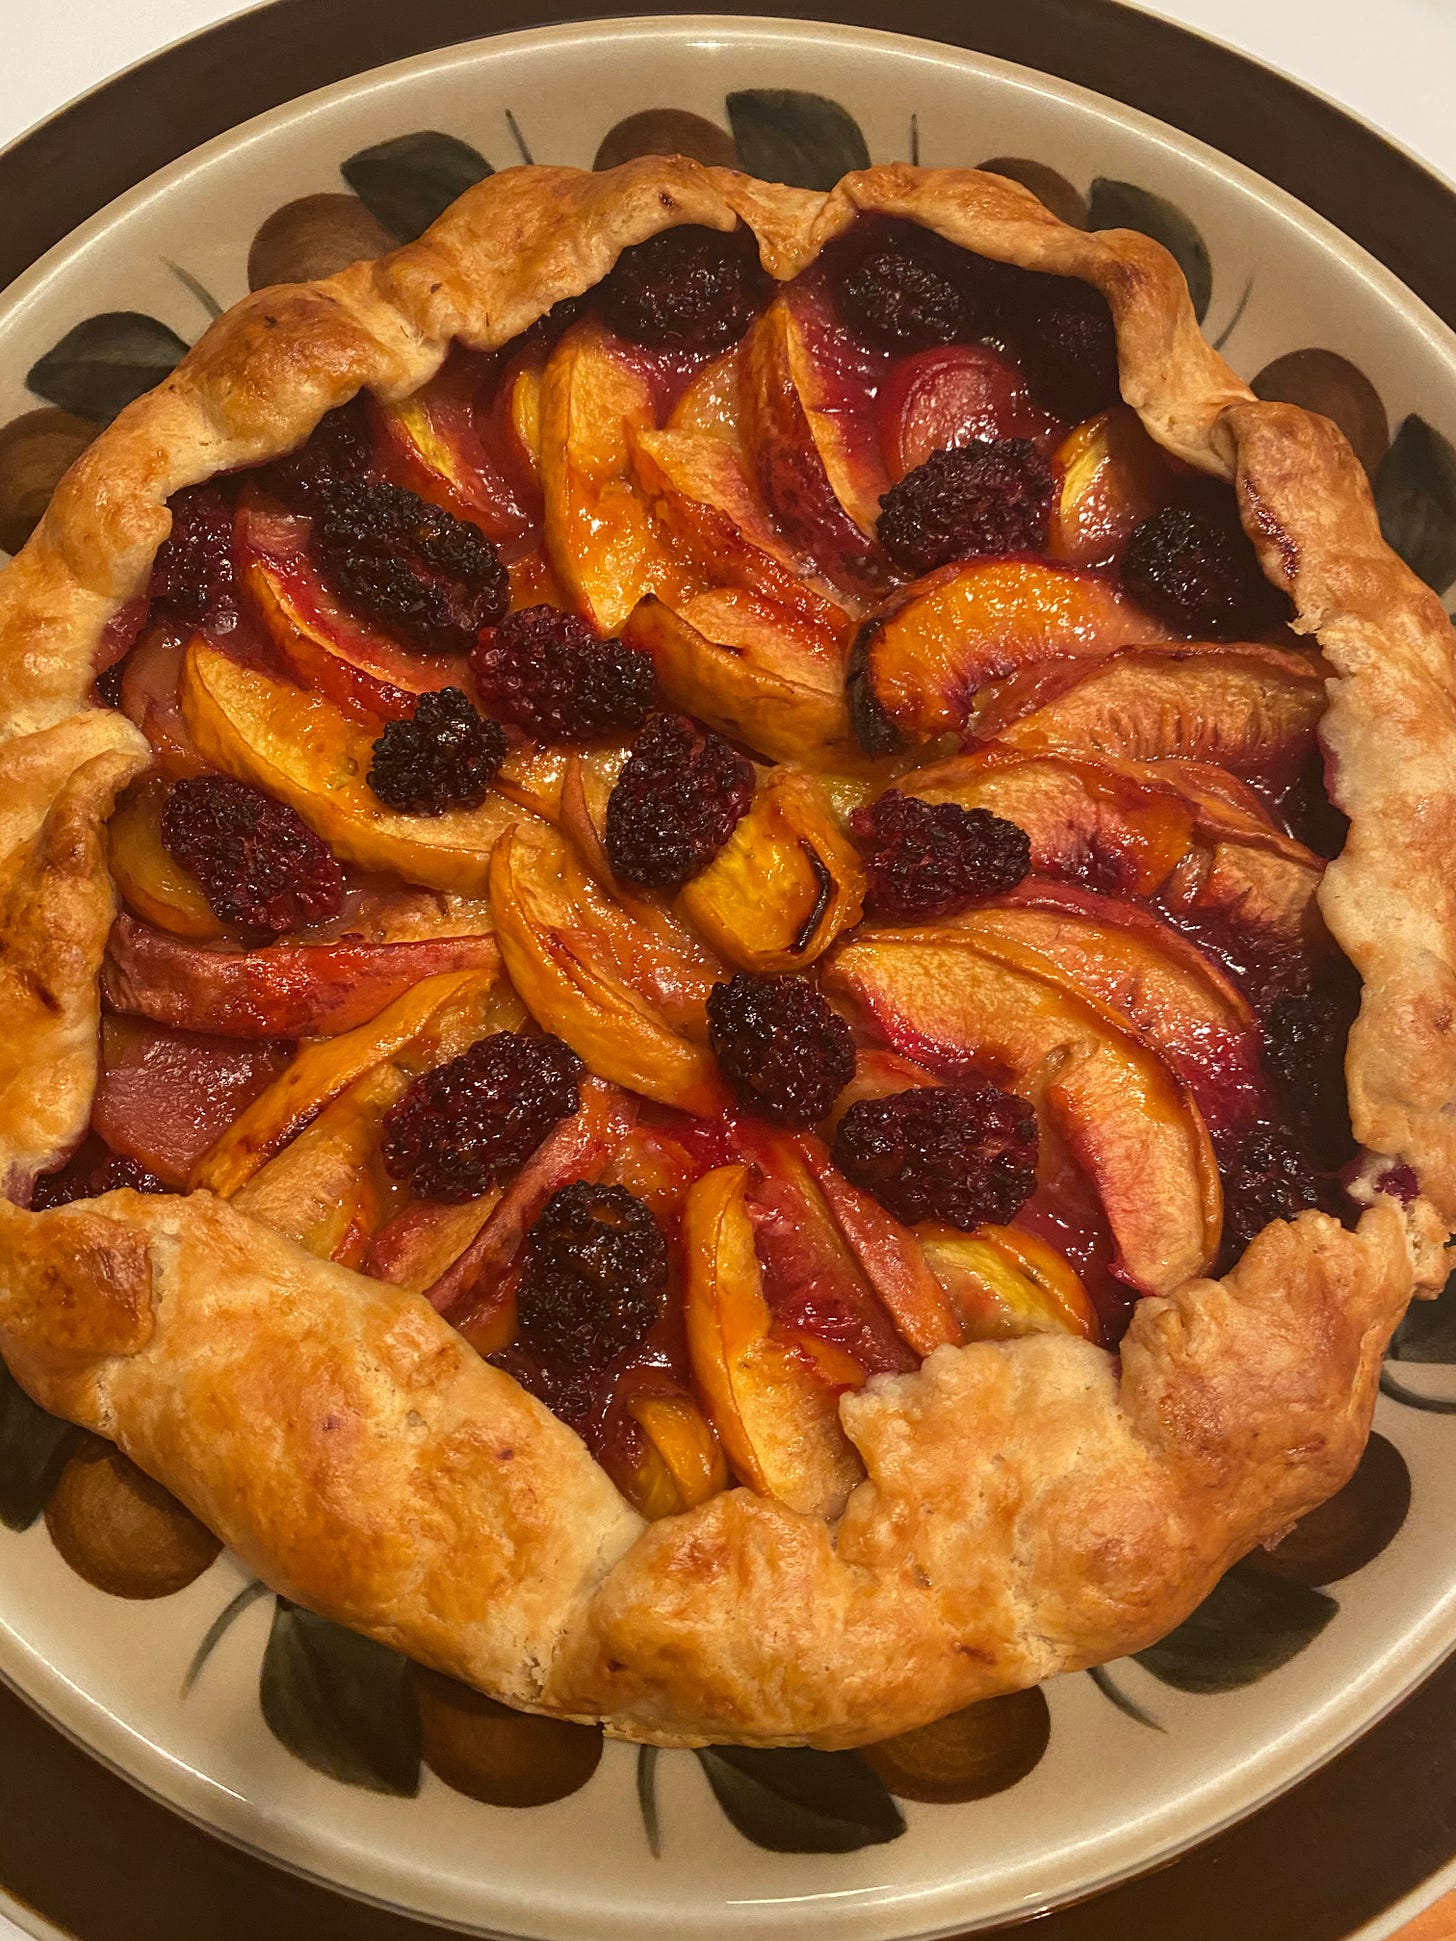
I use this crust for single- and double-crust fruit pies, lattice or not, and also galettes—open-face, free-form fruit pies baked on a sheet pan instead of in a pie plate. The dough has no sugar so it can be used for savory or sweet. It holds a quiche nicely. After the dough chills it has an amazingly pliable texture that is a joy to roll out. Yes, I just said it is a joy to roll out, and I mean it. Even after decades of making this dough, when I roll it out and pick it up to transfer to a pie plate, I am amazed by how supple it is. It can take as little or as much flour as you are comfortable working with. And it always bakes into an impressively flaky and delicious crust.
I’ve had experience using this recipe to overcome those most intimidated by the thought of making pie dough. (I’m looking at you, Peggy.) If you do as I say, I believe you can’t go wrong. While I say that I know that people may still go wrong. Everyone reads a recipe differently. But don’t give up hope. I know this works. And when you get it right this will likely become your house crust, too.
A Few Notes
Use the combination of flours as recommended—they have difference protein content—for the best texture of the finished crust.
Better butter makes better pie crust, not just because of the flavor, but also because the texture of European-style butters with higher butterfat content, and therefore less water, is stretchier, which results in a flakier crust. My all-purpose baking butter is unsalted Kerry Gold.
Using very cold or ice water is important to counteract the heat from friction of the processor blade.
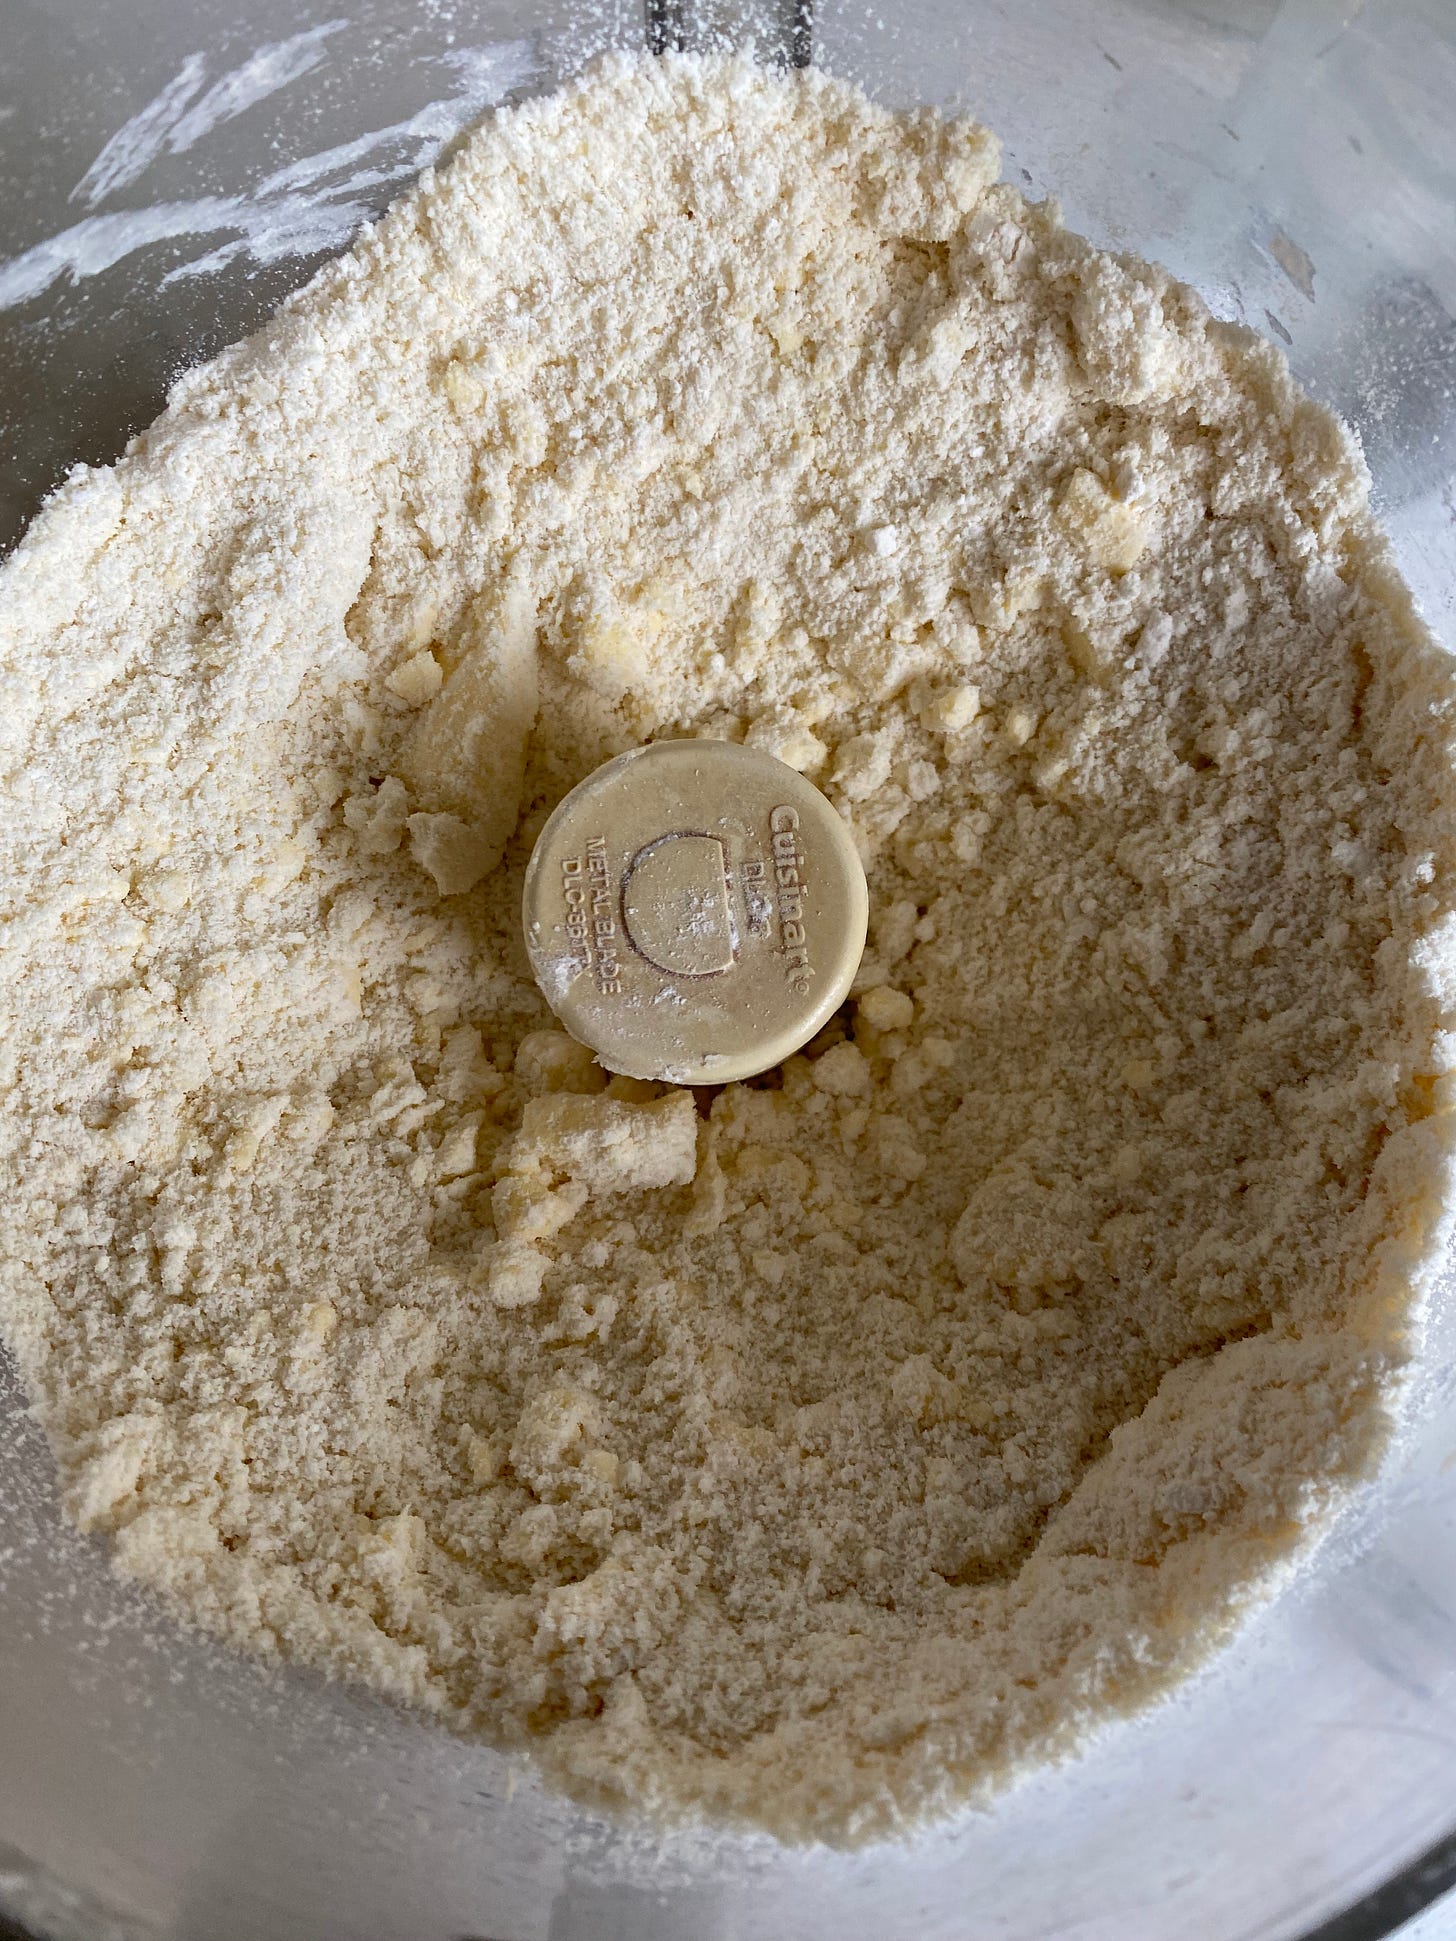
Don’t try to make this dough look perfect, that is smooth, or totally evenly mixed. It’s desirable to see streaks of butter, some floury bits. This sort of under working of the dough adds to the flakiness of the crust.
I’ve included a couple of step-by-step photos and a video to show you some of the trickier parts of making and handling the dough.
RECIPE: Mitchell’s Easy-as-Pie Pie Crust
This is the crust I’ve used for all the pies depicted in the photos in this newsletter. In fact, I’ve used it for all the pies I’ve made in the last 30 years. Sometimes I bush it with egg wash before baking. Sometimes I don't.
207 g (1 ½ cups) unbleached all-purpose flour
58 g (½ cup) cake flour (bleached or unbleached)
Pinch salt (about 3 g)
170 g (12 tablespoons) unsalted butter, chilled and cut into cubes
40 g (about 3 tablespoons) vegetable shortening or lard (can be room temp or chilled)
114 g (½ cup) very cold water
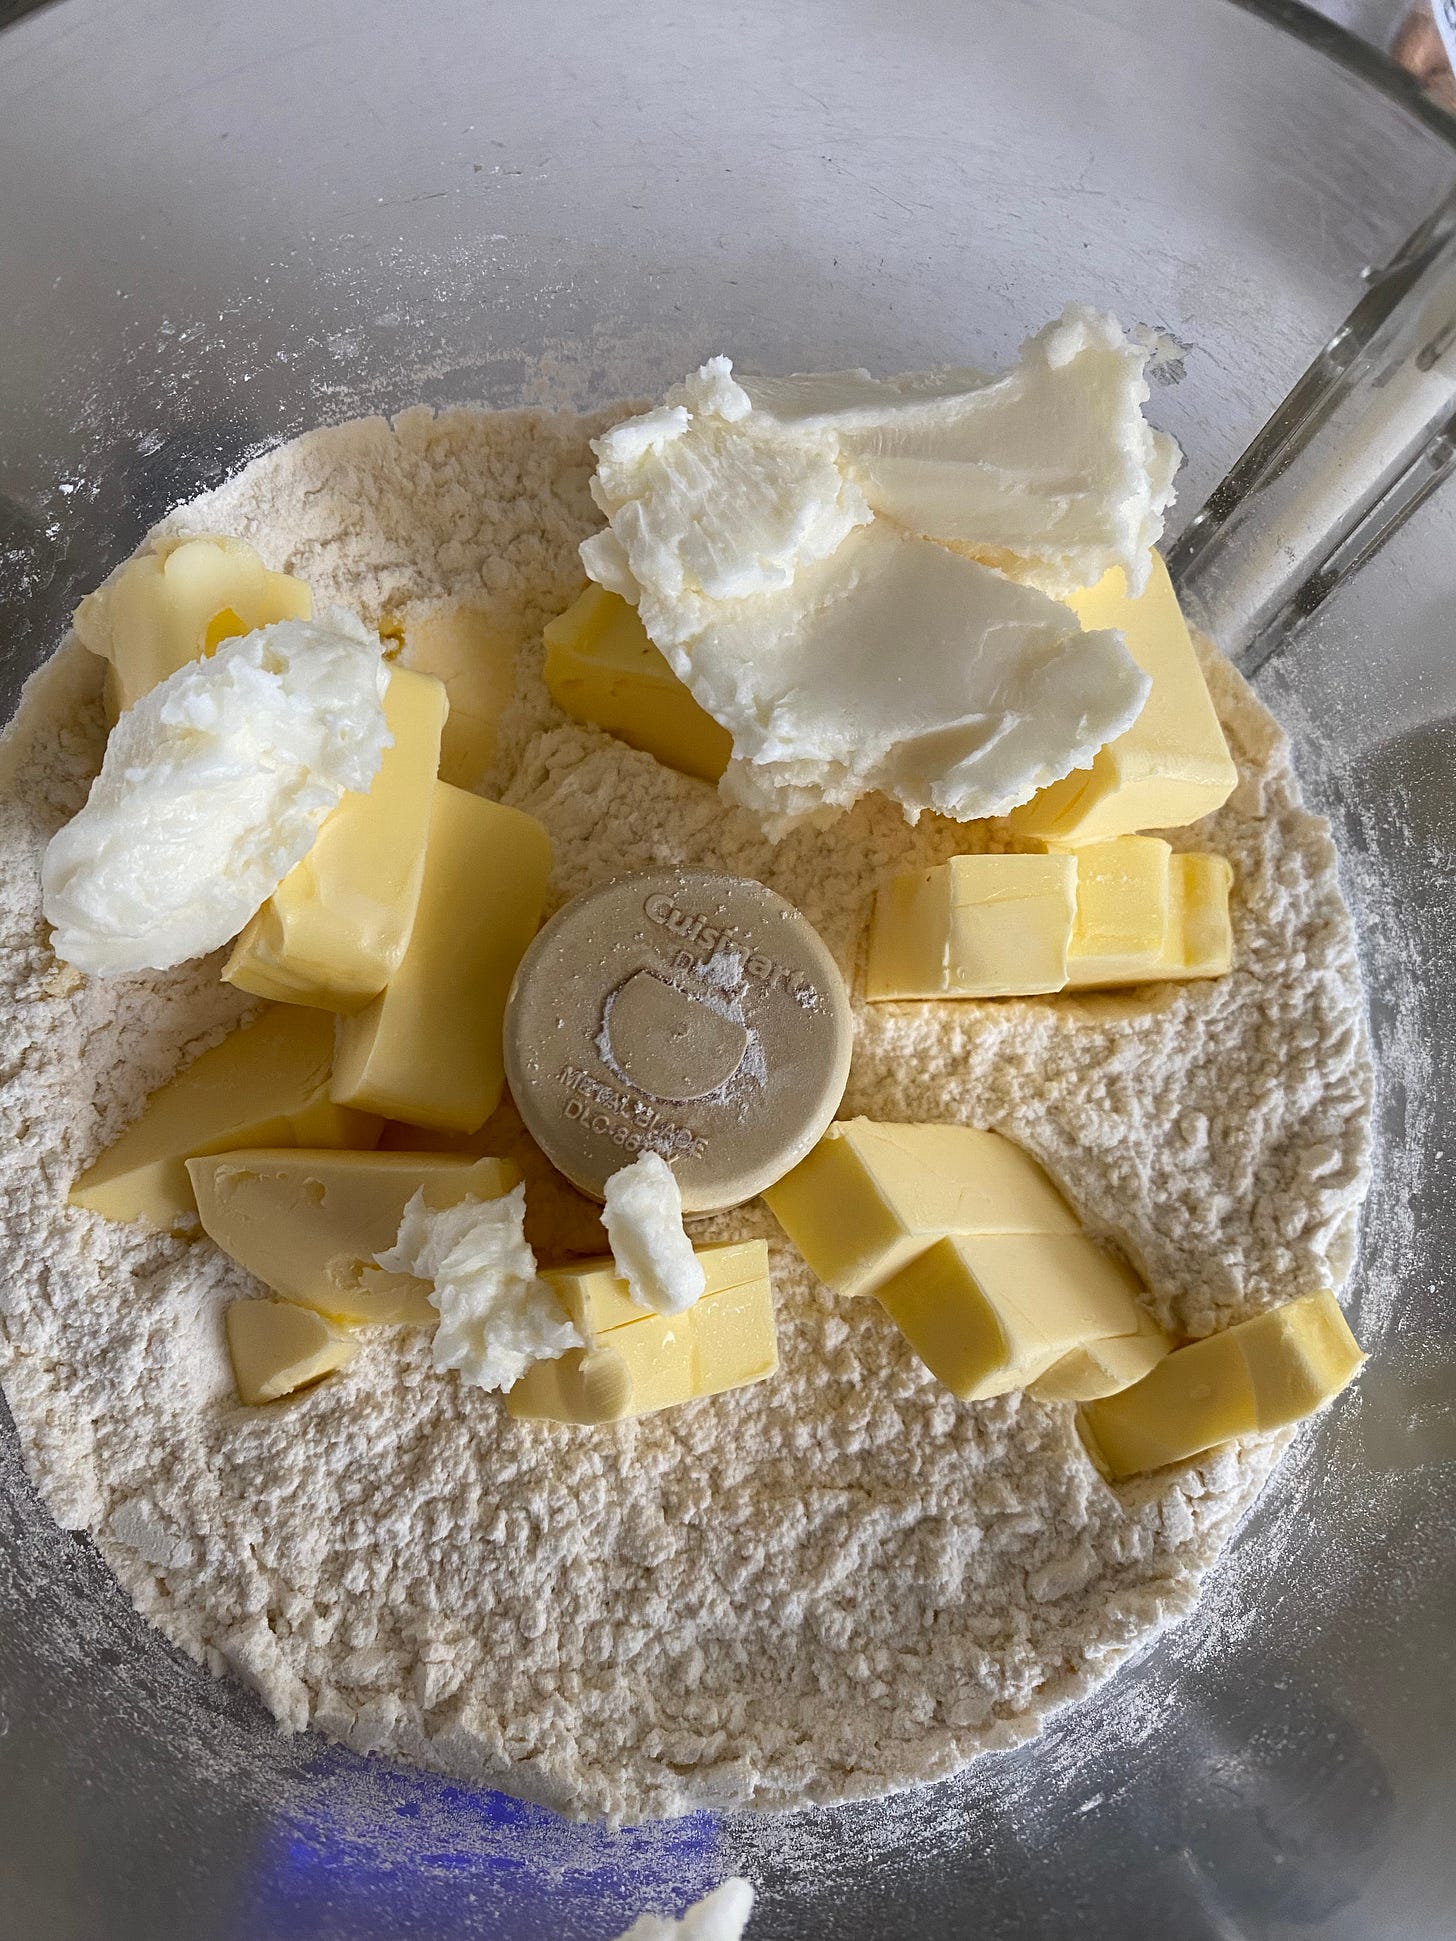
Combine the all-purpose and cake flours in the bowl of a food processor fitted with a metal blade. Add a pinch of salt. Process for 10 seconds to combine. Add the chilled cubes of butter and shortening or lard (see photo). Using quick on/off pulses, cut the fat into the flour mixture until it resembles coarse crumbs (see photo). Don’t worry if there are some pieces larger than others (these will make for larger flakes later). Don’t let the machine run too long for any one pulse; it’s better to use shorter pulses.
Have the cold water in something that you can pour from. With the processor on (i.e., not pulsing), quickly pour the cold water down the feed tube all at once. Keep the machine running just until the dough begins to ball around the blade. Don’t worry if there are a few stray crumbs that haven’t cohered into the ball or even some flour around the sides of the bowl.
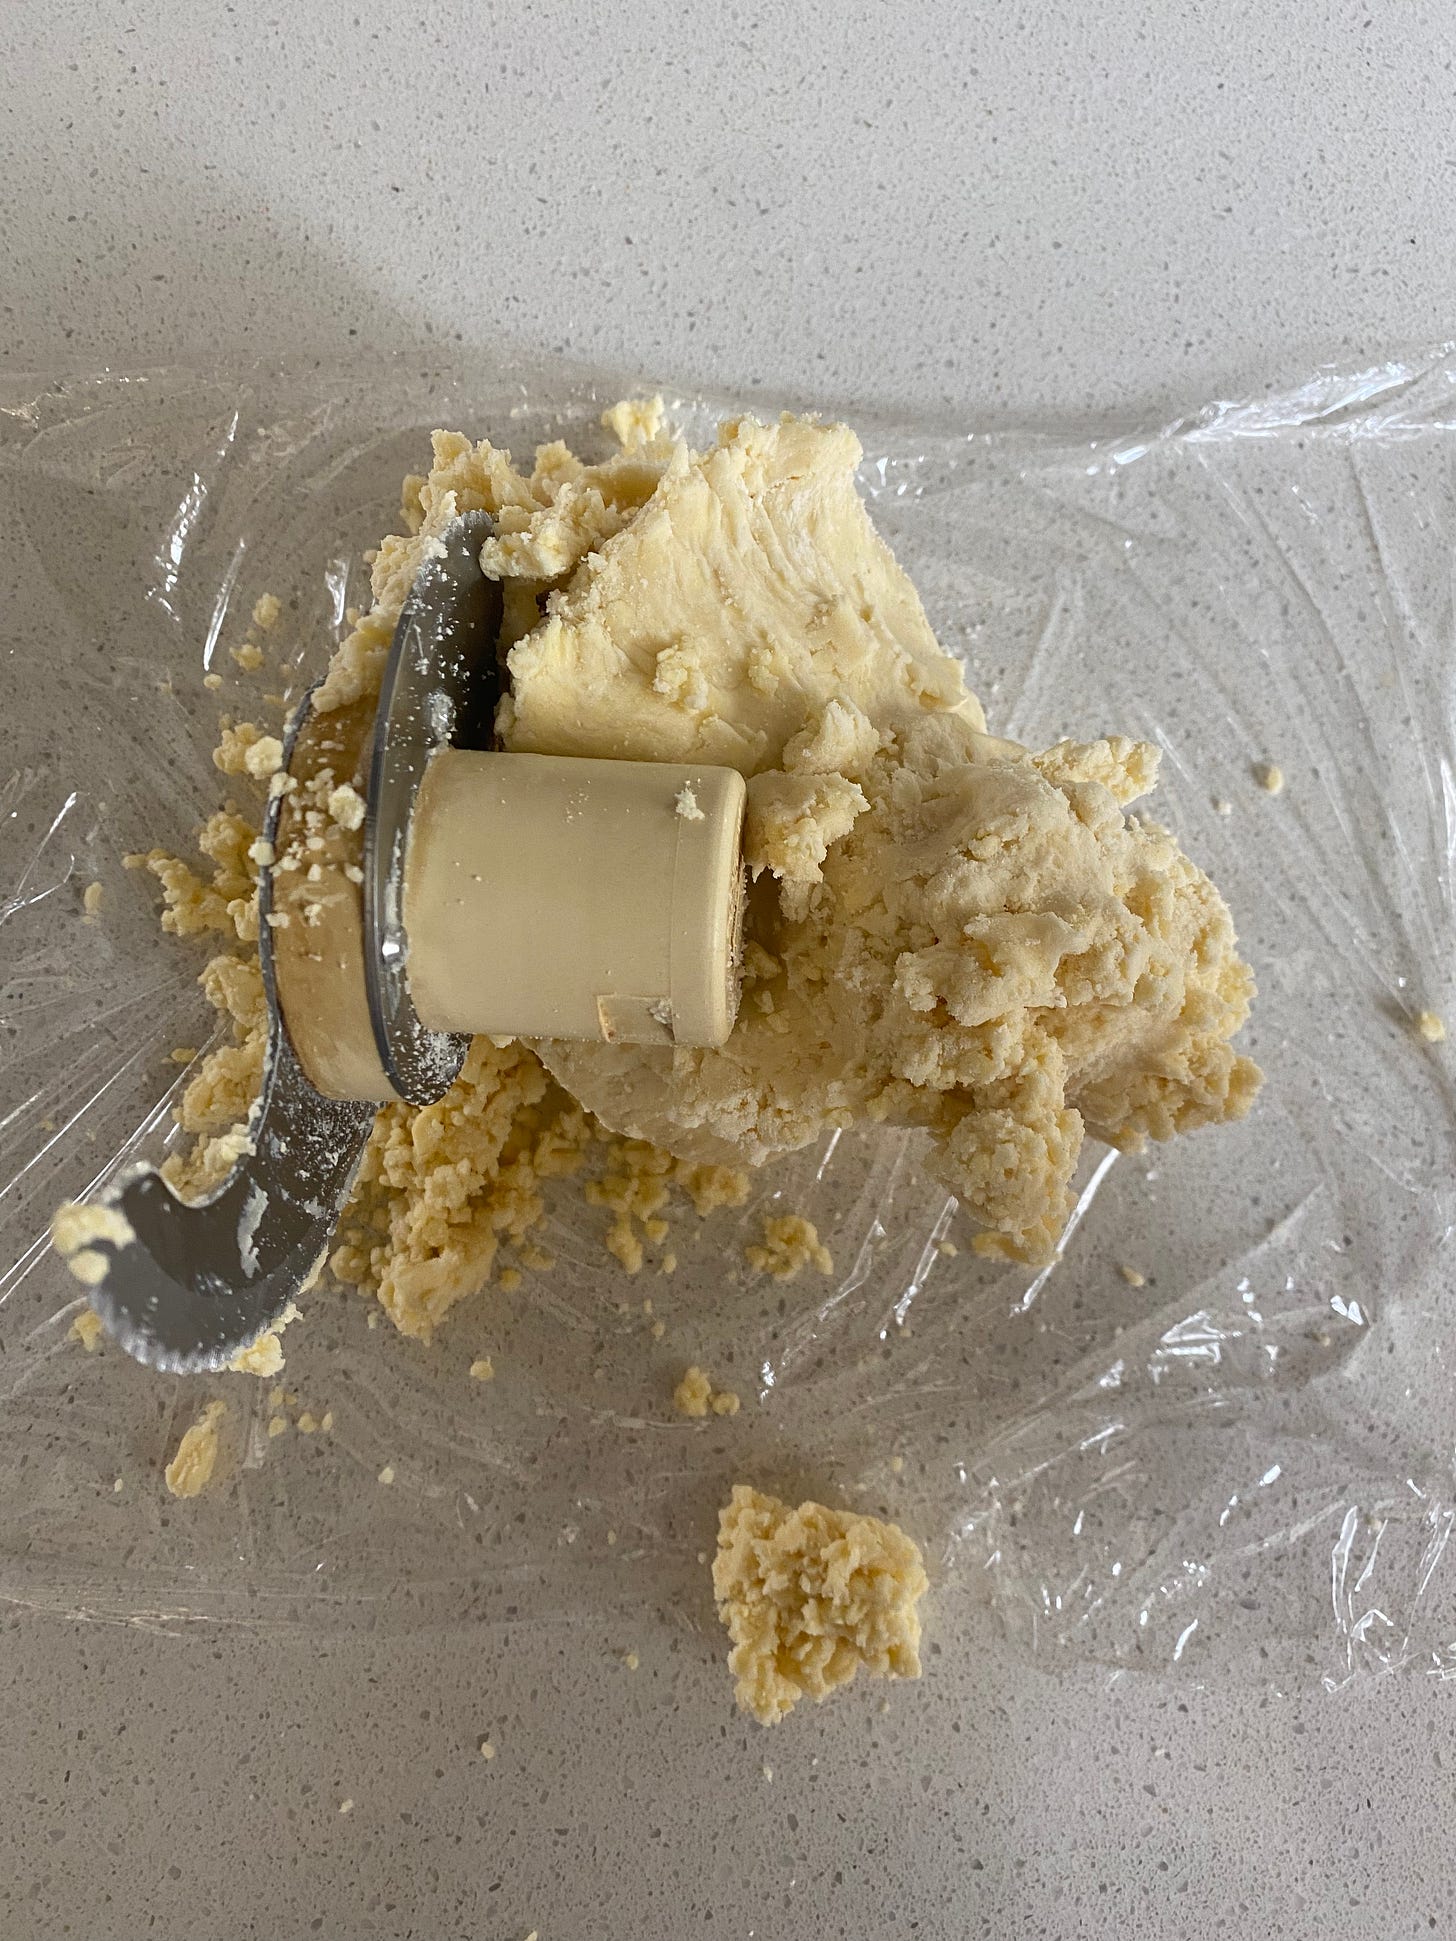
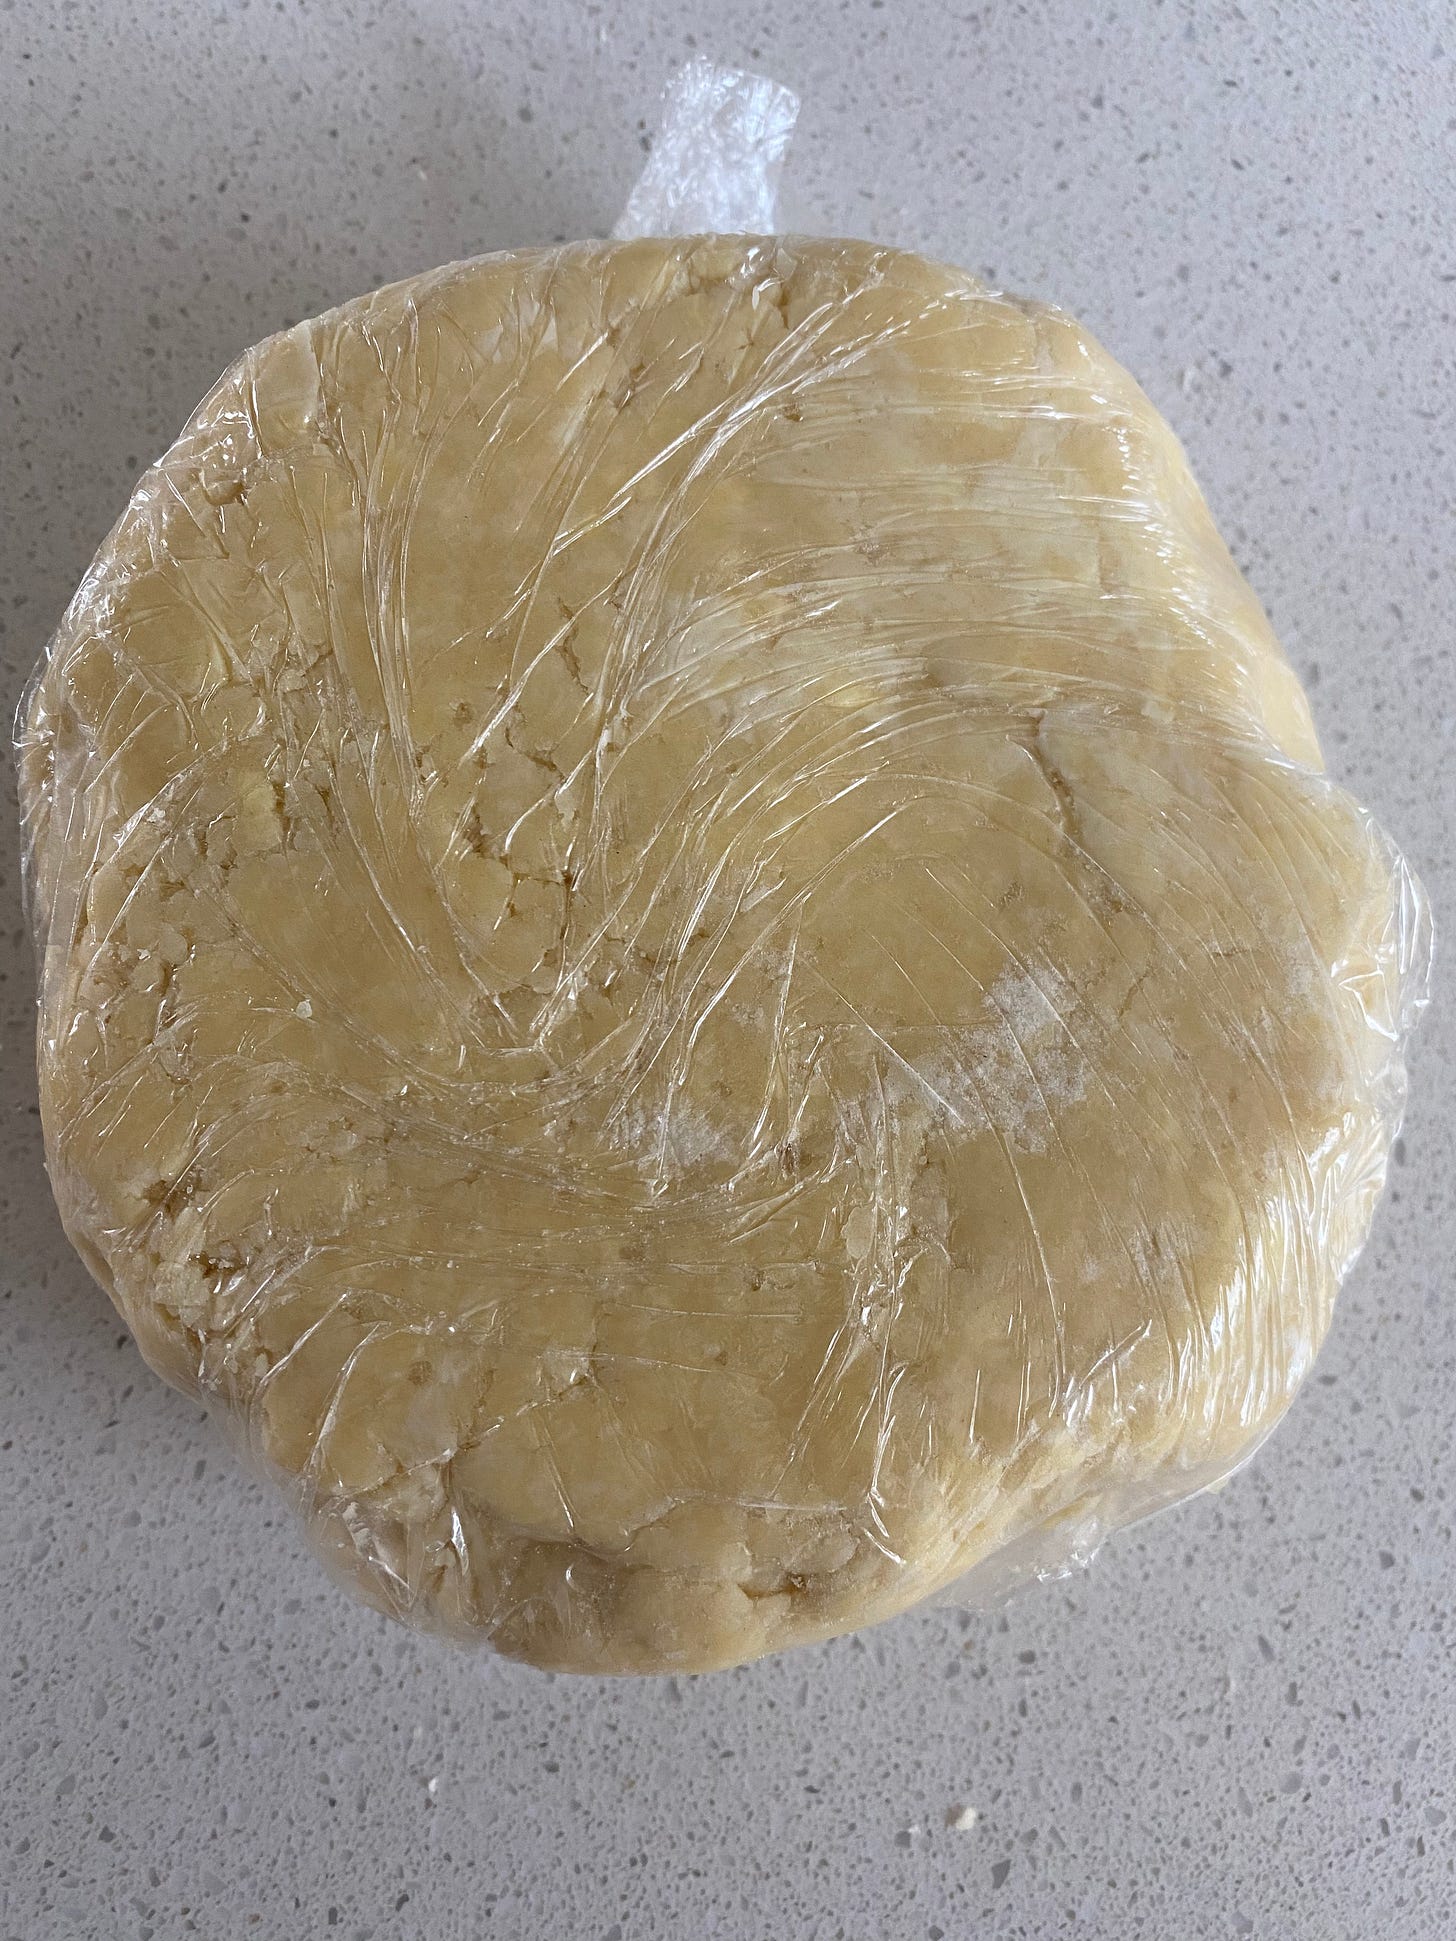
Stop the machine. Lay a piece of plastic wrap onto the counter and dump the contents of the bowl onto it (see photo). Remove the blade. Scrape out any dough that didn’t come out and mound the dough on the plastic wrap. Use the wrap to shape the dough into a disk (your hands are too warm)(see photo). Wrap tightly and refrigerate at least 4 hours, better overnight, before using.
The dough can stay in the refrigerator for up the three days or it can by frozen for up to six months. To defrost, put the dough in the fridge for a couple of hours before rolling out.
Some Visual Aids
A Note About Finding a Good Recipe and Sticking with It
Underlying too much of recipe writing these days is a kind of culinary #FOMO (Fear of Missing Out), that someone has developed a better, more perfect recipe for something that makes you want to drop everything you are doing right this minute to try it. I don’t support this approach to recipe writing or cooking, although I realize the way I’ve set up this pie crust may indicate otherwise.
Let me say that if you make a pie crust that you love and it’s easy to get right, stick with it. That’s why I’ve been making this same pie crust for decades. I know it works. I always have the ingredients on hand. It’s part of my repertoire. It’s what I want when I make a pie.
I balk at the underlying notion of books like 100 Brownies or 200 Chocolate Chip Cookies or 365 Chicken Dishes. Nobody needs that many recipes for those things—just a good one or two. And when you find the one or two you and your family like, I would encourage you to stop looking. Keep building your culinary repertoire, but with new dishes, not just new recipes for the same dishes.
Another Recipe Peeve
While I’m on the subject or recipe-writing peeves, I’ll say I’m also not a fan of the faux scientific genre of recipe writing that presumes by testing every permutation of every ingredient and technique and combining them into one “perfect recipe” you can arrive at the epitome of anything. Such cooking devalues a kind of folk knowledge that I think is part of what makes something good. It also negates the flexibility and variability characteristic of any great home cook. And it leads to kooky things like a recipe for pancakes I once saw that had you stir the white of an egg into the wet ingredients and the yolk into the melted butter before combining everything with the dry ingredients. No one cooks like this or should. Just crack your eggs.
You might think that this quasi-quantitative culinary culture comes from social media, but it certainly predates it. Faux scientific perfection of cooking was the model the rocketed Cook’s Illustrated to success along with subsequent titles from America’s Test Kitchen. Other magazines and websites followed suit. I appreciate and admire the work, but I’m not sure it serves cooks well. At last not all cooks, especially not those who just want to make something people will like for dinner. I’m not a Luddite, mind you. I pick up new techniques and tricks from those who tool away in their kitchen laboratories and I weave them into my cooking. (Using white miso to build umami is a current fixation.) But I still feel good home cooking is at odds with a sense of scientific precision best reserved for kitchens in Michelin three-start restaurants, and even there, perhaps it comes come at the cost of flavor and and a sense of hospitality.
RECIPE: Peach Pie
Upon eating this peach pie, one of the peach pickers with us commented, “I think this is the most delicious pie and pie crest I’ve ever eaten. Will you show me how to make it?” Hence the topic for this newsletter. See above.
4 pounds ripe peaches
½ cup sugar
2 to 3 tablespoons all-purpose flour (depending on how juicy your peaches are)
2 tablespoons cornstarch
Freshly grated nutmeg
1 recipe pie crust (see above), chilled
1 egg beaten with 1 tablespoon water
Turbinado or sanding sugar (optional)
I prefer my peaches for baking peeled. To do so, bring a small but deep pot of water to a boil. Have a large bowl of ice water nearby. With a small paring knife, cut an X into the bottom of the peaches. Plop 2 or three peaches into the boiling water (they should be completely submerged) and let cook for about 1 ½ to 2 minutes until you can see skin of the points of the X you cut start to pull back. Using a slotted spoon or spider, transfer the peaches to the ice water. Using the paring knife, remove the peel. If the peaches are ripe, the peel should slip off. If a little underripe and harder, you may have to cut some of it off like you would peel an apple. Repeat with the remaining peaches until all are peeled.
Cut the flesh of the peach off the pit so you have bite-size slices, wedges or chunks. (Easier with freestone than clingstone peaches.) Place the cut peaches in a medium mixing bowl. Add the sugar, flour, cornstarch and just a few gratings of nutmeg (you want the nutmeg flavor in the background, not the foreground).
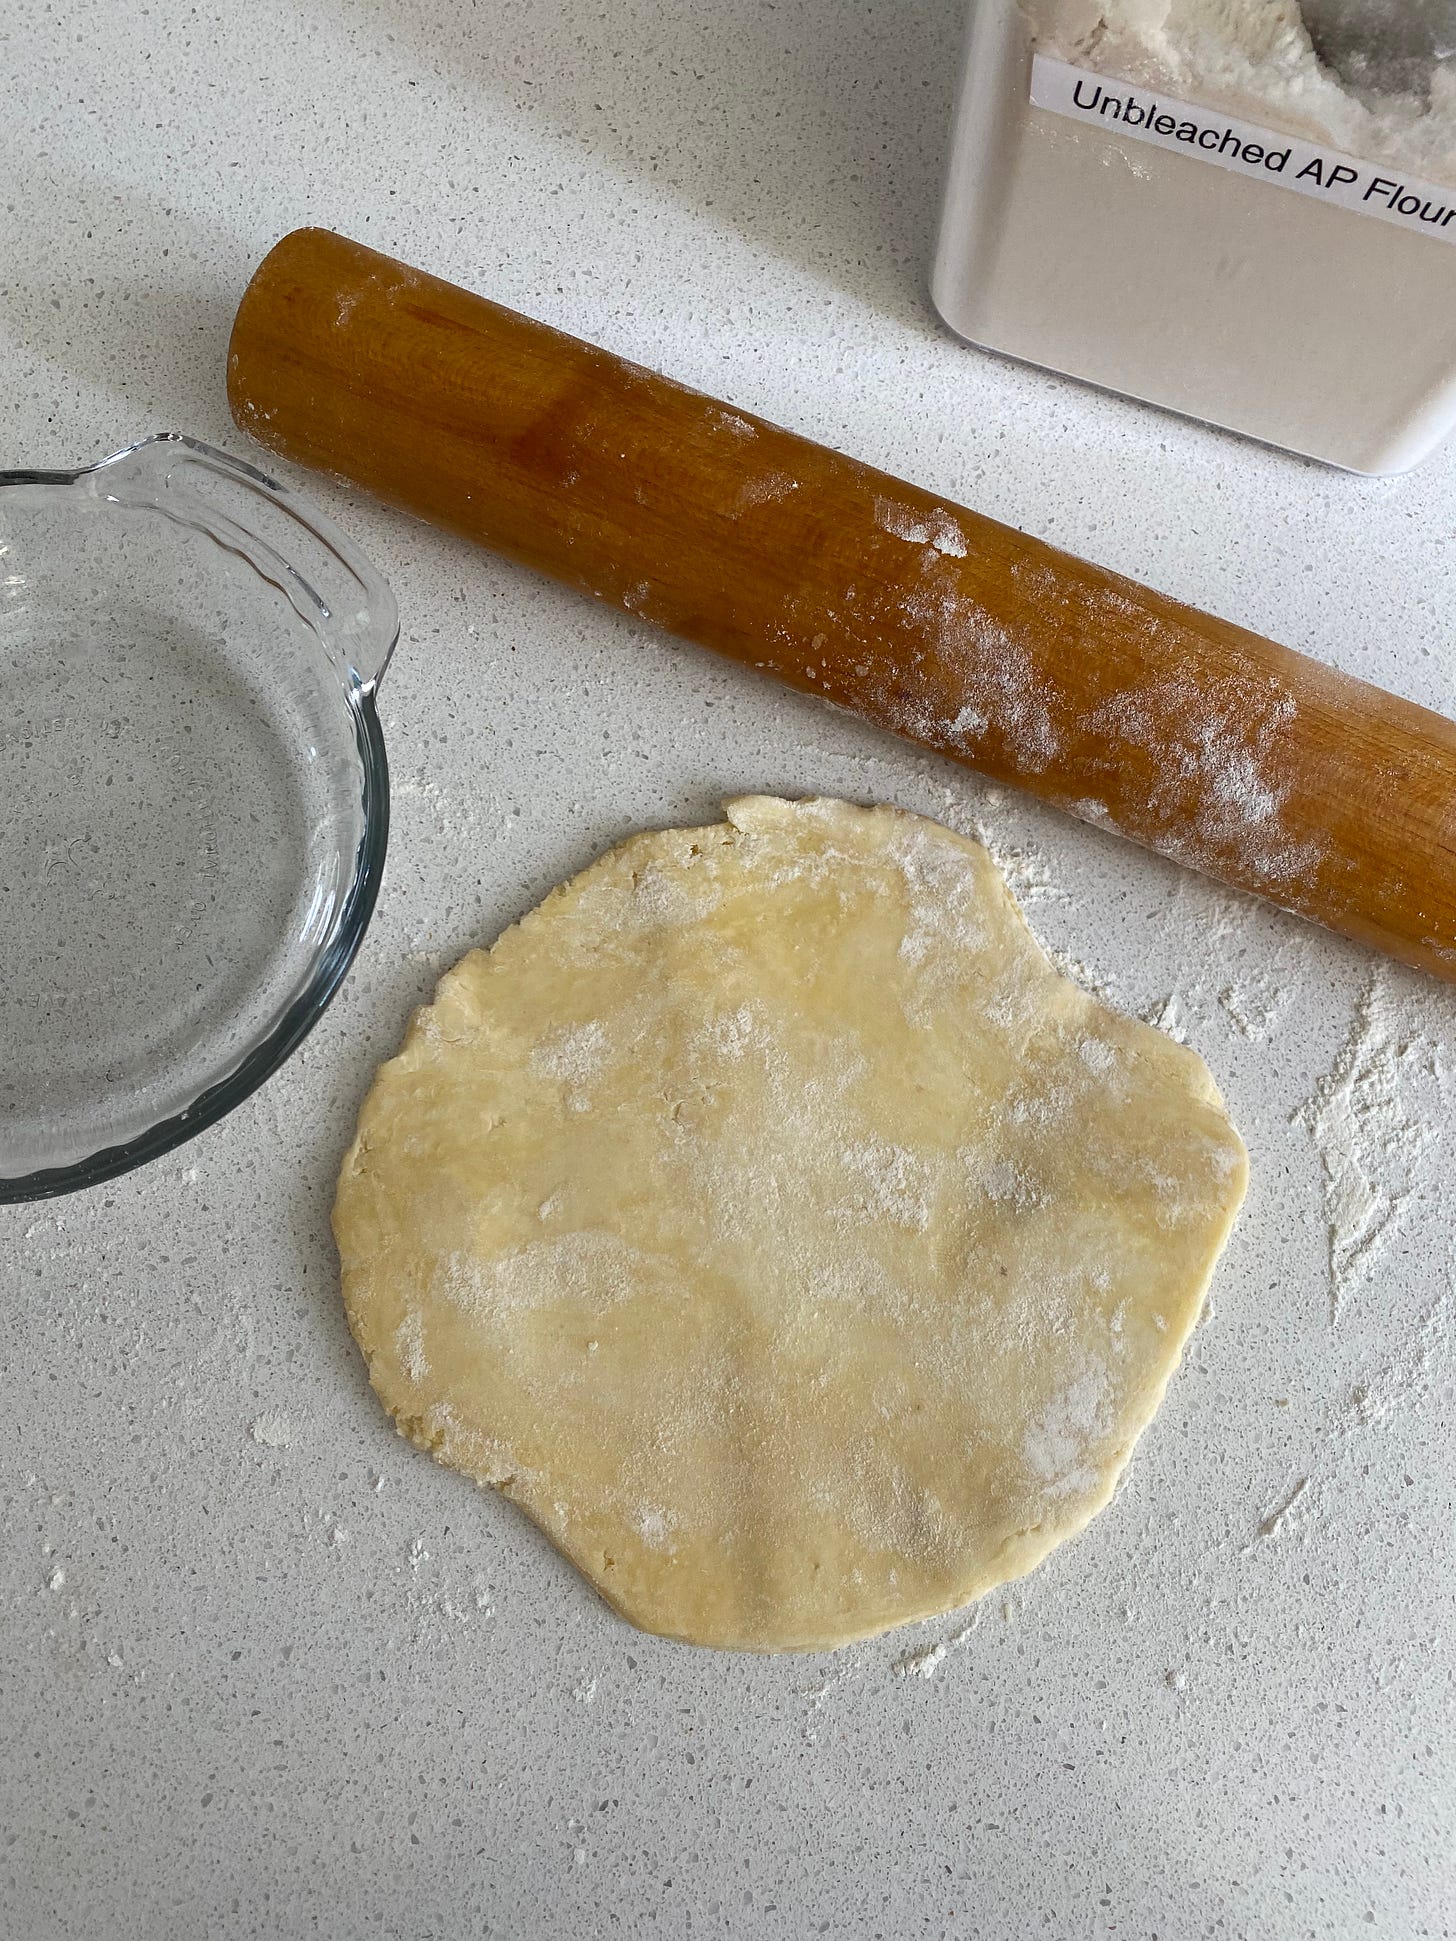
Divide the dough into 2 unequal pieces, one slightly larger than the other, about 60:40. Shape each into a round disk. Place the smaller disk back in the fridge while you roll out the larger one; this will be the bottom crust. On a lightly floured surface, with a floured rolling pin, roll out the larger disk to about a 12- to 14-inch circle, give or take. (Despite all of the rolling out of dough I’ve done in my day I’m terrible at rolling out a circle; I usually get something more like the shape of Australia.) Use the rolling pin to pick up the dough and transfer it to a 9-inch pie plate made of glass, ceramic, or best black metal, if you can find it. The dough should hang generously over the edge. Make sure the dough is snugly in the pan by pressing it gently with your fingertips against the pan, especially where the bottom meets the slope of the side. Lift the dough up from the edge and lay it back down to be sure.
Pour the peach filling into the bottom crust. Remove the smaller disk of dough from the fridge and roll it out to a 10-inch circle. Moisten the edge of the dough around the pie plate with a touch of water. Use the rolling pin again to transfer the dough on top of the filling, with an equal overhang of about an inch all around. Lightly press the edges of the dough to seal. I don’t like to cut off too much crust as I love crust, especially when it is really well baked. Instead, I trim to make sure there is an even overhang of crust all around. If there is more bottom crust than top crust overhang, I roll the dough up to form a thick edge. If there is more top crust than bottom crust overhang, I roll the dough under to form the edge. Either way, the point is to seal the filling inside and make a thick edge around the circumference of the pie plate.
Now, with the index finger and thumb of your left hand and the index finger of your right hand, crimp the edge by pushing the dough with your right index finger between your left finger and thumb and moving around the entire edge. Use some force here to seal the dough and make an attractive, raised, scalloped edge. There are many different ways to make and edge, if you prefer something else. Search YouTube and you’ll find videos to help.
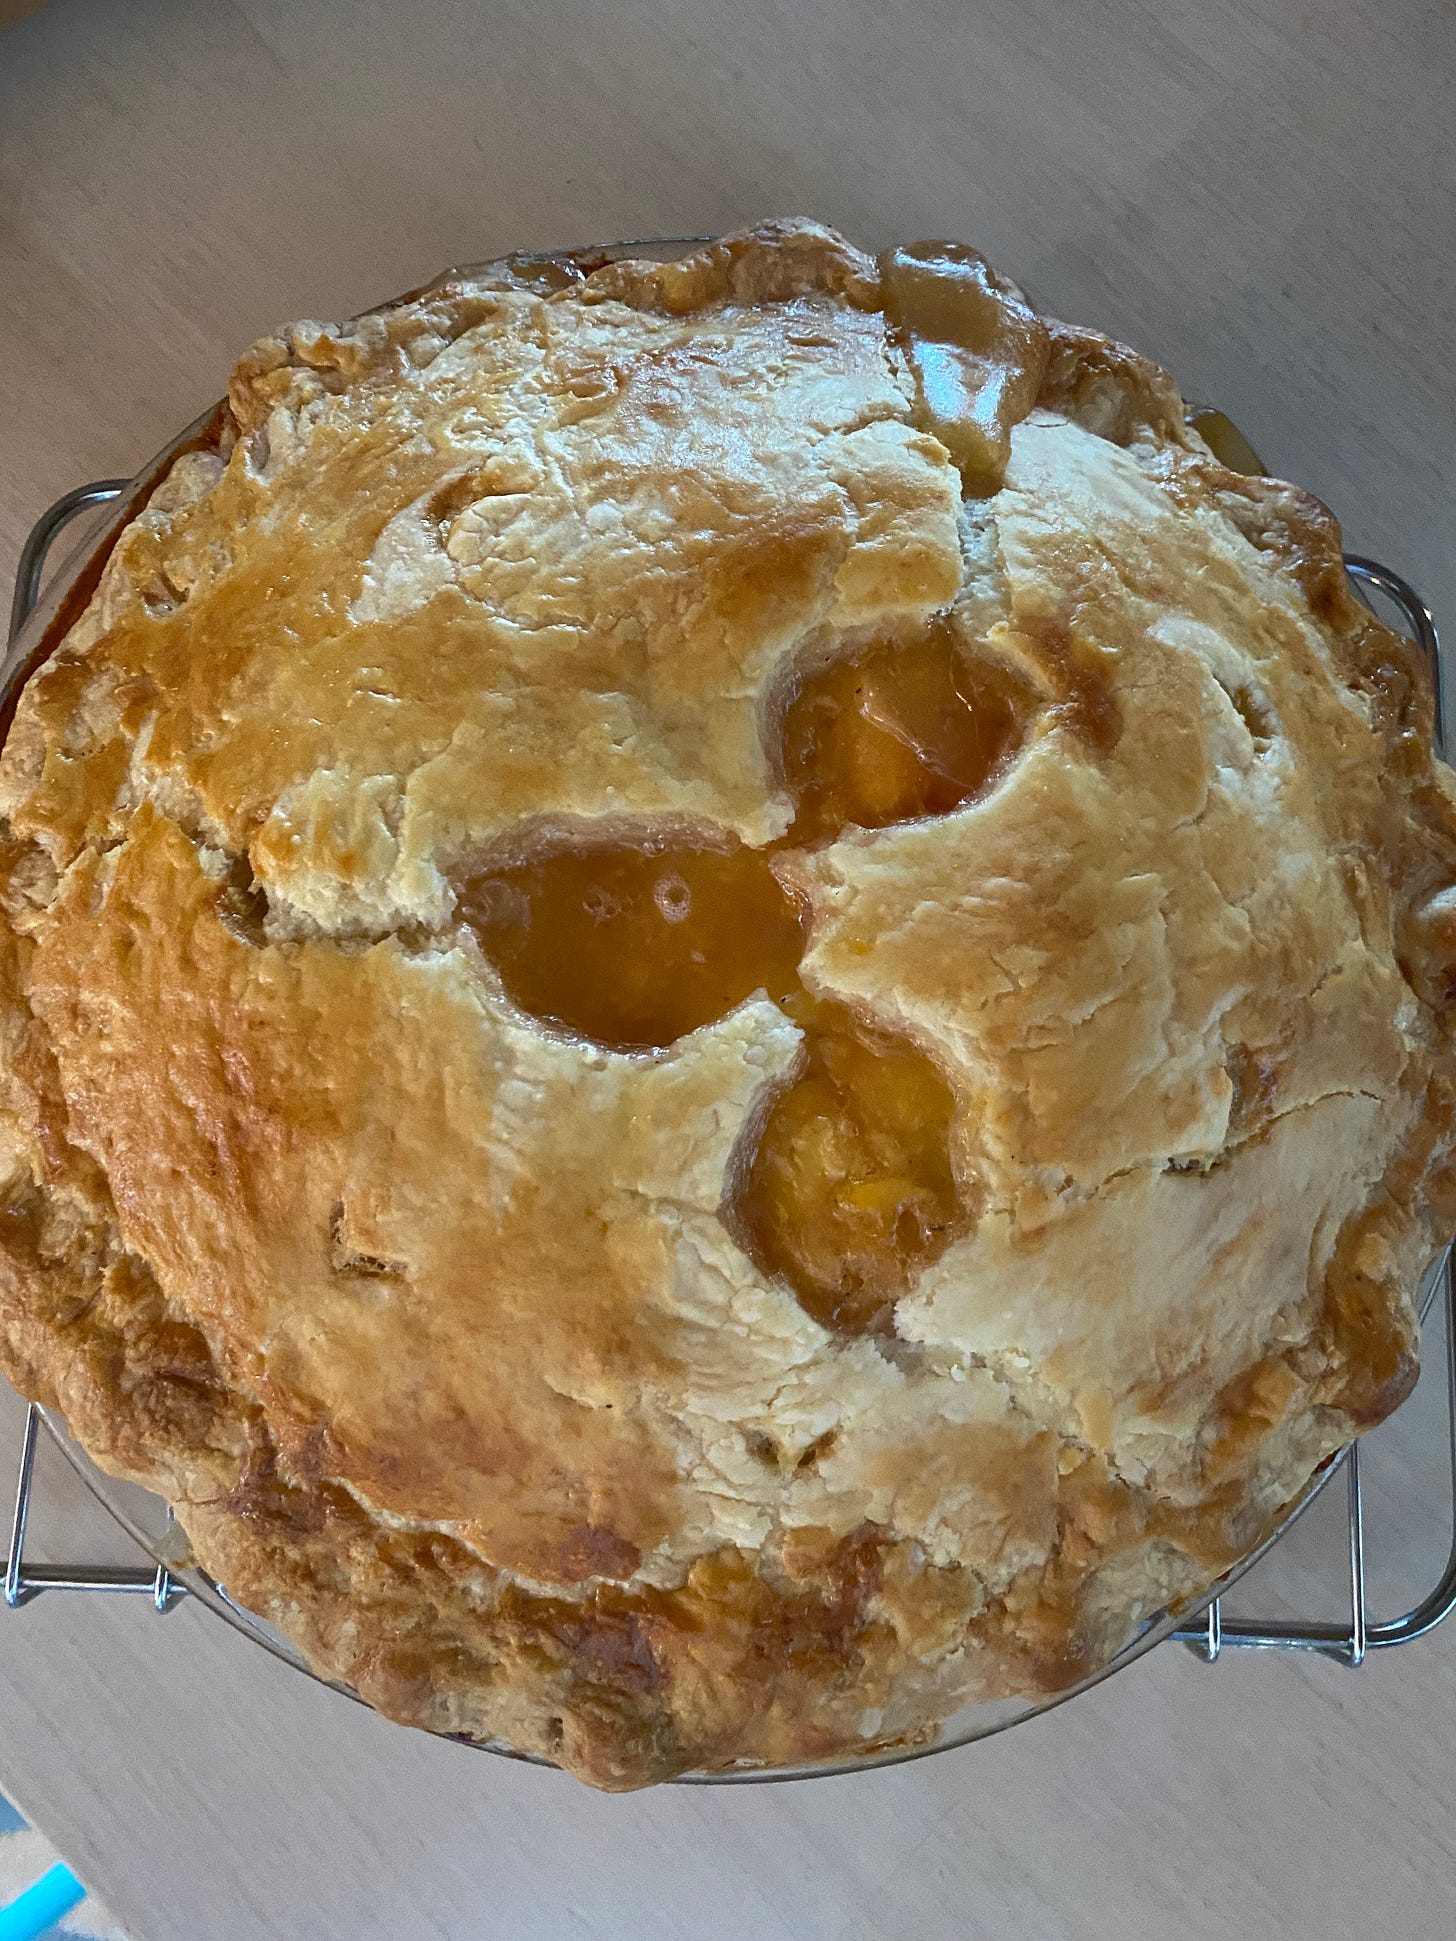
Importantly, now chill the pie at least 30 minutes and better for an hour before baking. While chilling, preheat the oven to 425°F. Place the pie on a sheet pan. Using the point of a sharp paring knife, make a few slits or decorative openings in the top crust to allow the steam to escape. Using a pastry brush, brush the top crust and the edge with egg wash. If you like a sugary crust, sprinkle turbinado or sanding sugar over the top.
Set the pie in the preheated oven until the crust starts to brown, about 30 to 40 minutes. Lower the oven to 375°F., and continue baking for another 25 minutes or more until the crust is dark golden brown. When in doubt, better to bake it longer. A pie can go for as long as 90 minutes in the oven. You want the crust browned on top, cooked on the bottom, and the fruit in the middle bubbling so that it cooks through and the starch gelatinizes. You should see the bubble through the slits you made in the top crust. Remove the pie from the oven and cool it on a rack. I mean really cool it, to room temperature, before slicing and serving, with ice cream, of course. #alamode #pieseason
Some More Visual Aids




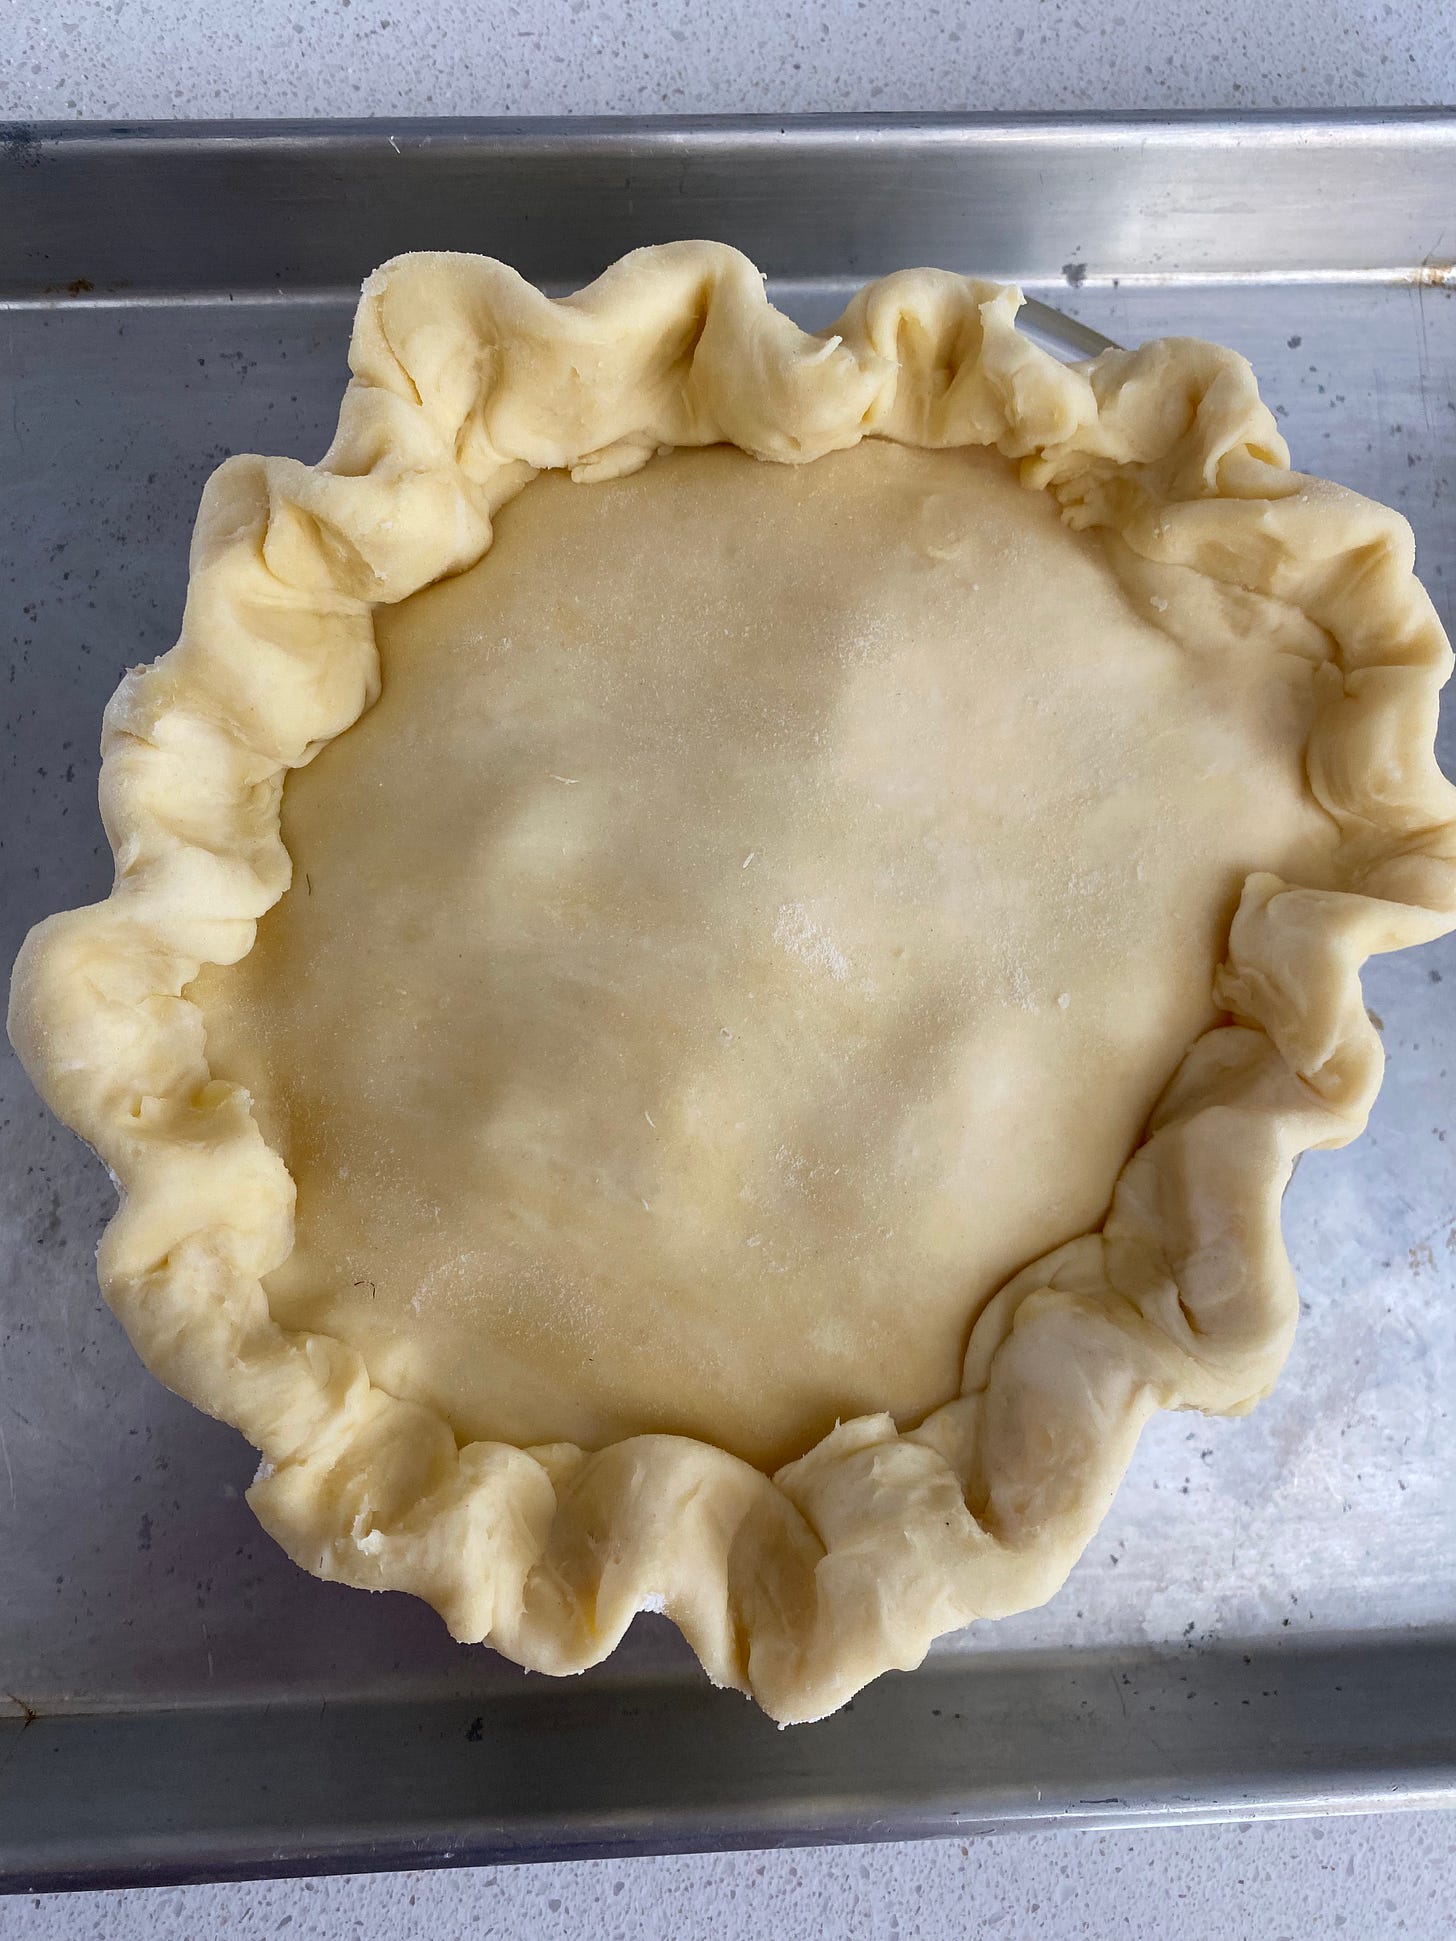
A pastry chef friend of mine told me that she always freezes pies before baking. Keeps everything intact. My only problem is thinking that far ahead.